Meshtastic Coverage Mapping
Discover the power of Meshtastic with our step-by-step guide on creating coverage maps for your Lora nodes. These maps are key in optimizing communication range, visually showcasing signal strength and coverage areas within a LoRa mesh network.
In this guide we will use a really cool tool to create coverage mapping for our Meshtastic Lora node. Coverage maps play a crucial role in optimizing communication range for Meshtastic devices. These maps visually represent the signal strength and coverage areas of a LoRa mesh network, offering valuable insights into the performance of your devices
Getting Started:
Create Your Account:
- Visit https://www.ve2dbe.com/rmonline_s.asp.
- Sign up and check your email for the password.
Define Your Site:
- Log in, go to the main menu, and select "New Site."
- Place a pin or enter coordinates for your site.
- Click submit, name your spot, add elevation, and hit "Add To My Sites."
Building Coverage Maps:
Creating Coverage Map
- Go back to the main menu,
- Click on "New Coverage."
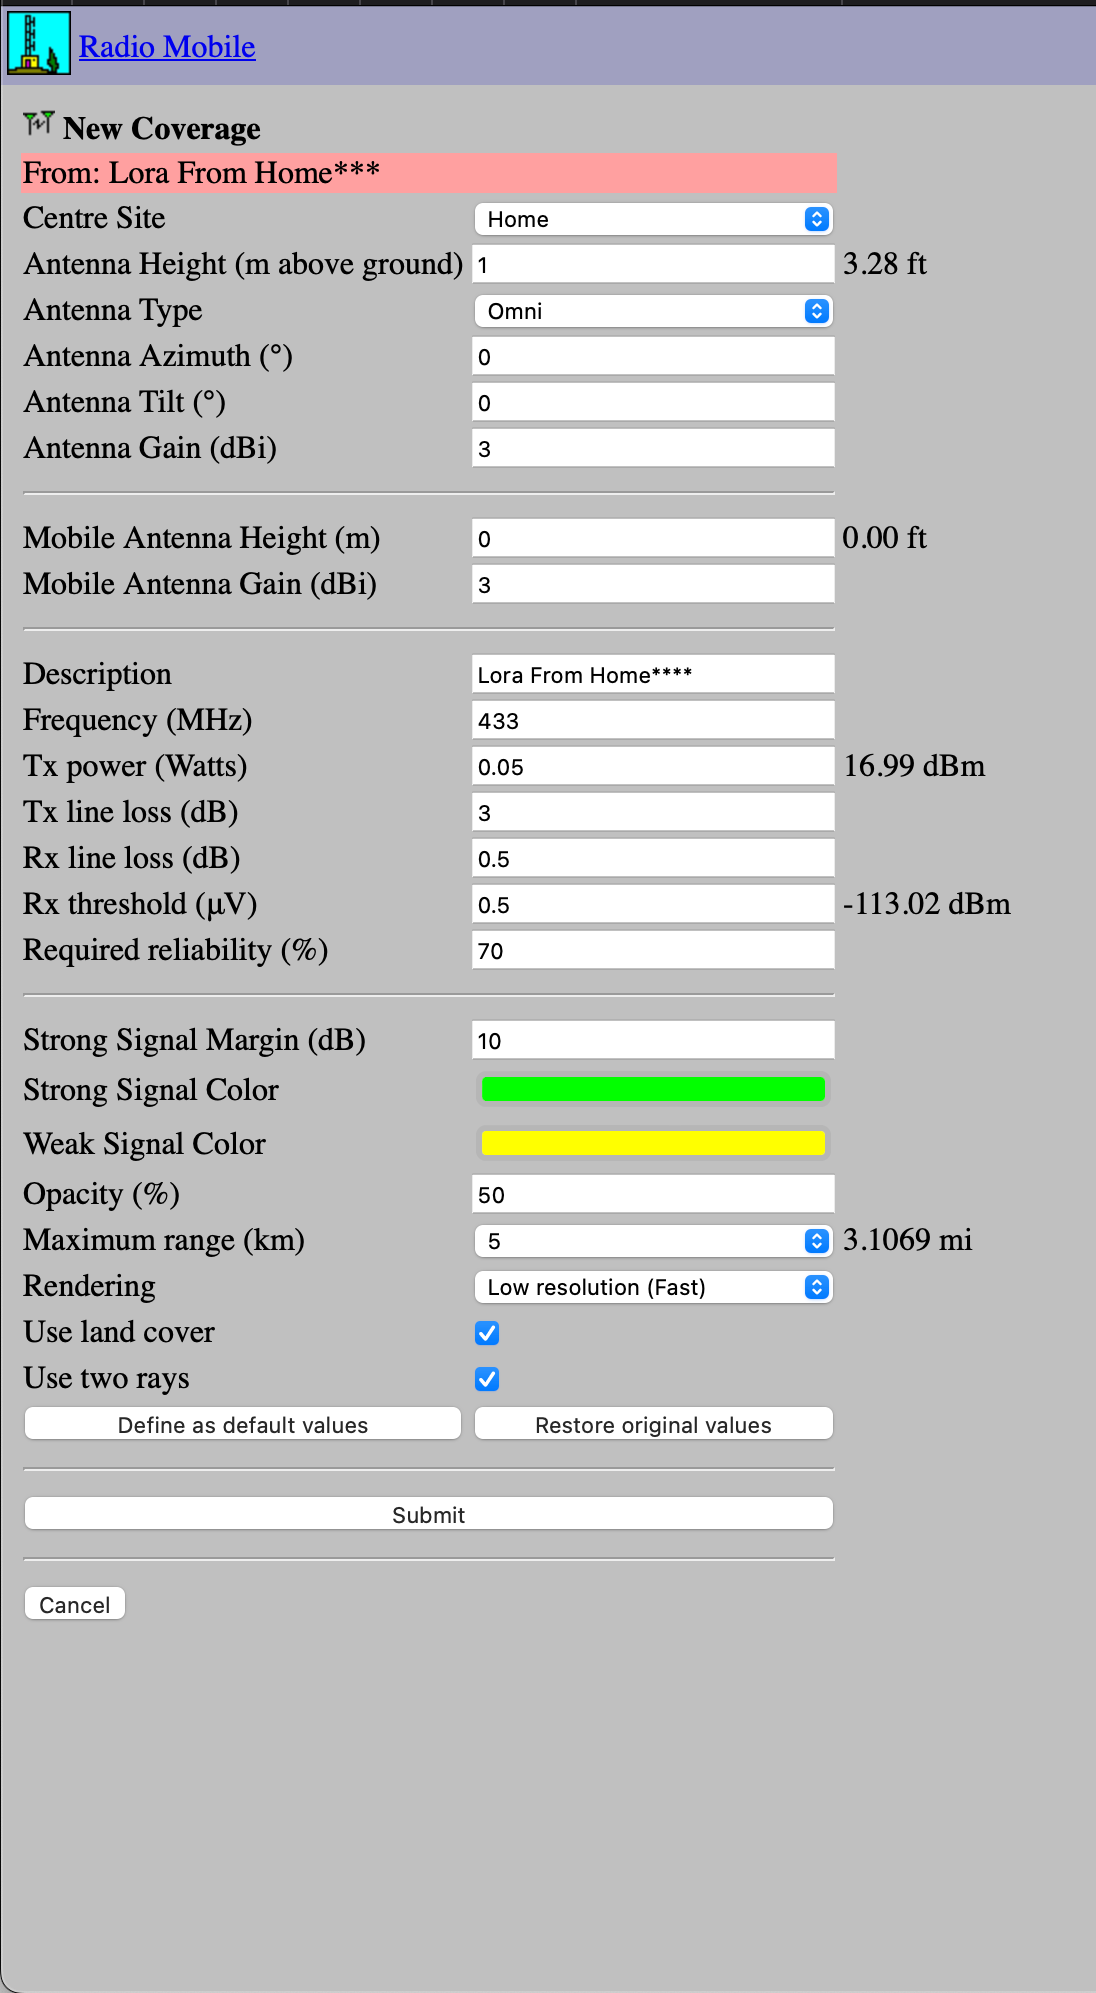
- Enter node settings
- Centre Site: Your defined site.
- Antenna Height (m above ground): Typically around 1 meter.
- Antenna Gain (dBi): Enter the gain specified by your antenna manufacturer (e.g., 3dBi).
- Mobile Antenna Height (m): Height of the receiving node's antenna.
- Mobile Antenna Gain (dBi): Gain of the receiving node's antenna.
- Description: Give your coverage a name.
- Frequency (MHz): Lora chip operating frequency (e.g., 433MHz).
- Tx power (Watts): Transmission power (find in Meshtastic App -> Settings -> Lora -> Transmission Power).
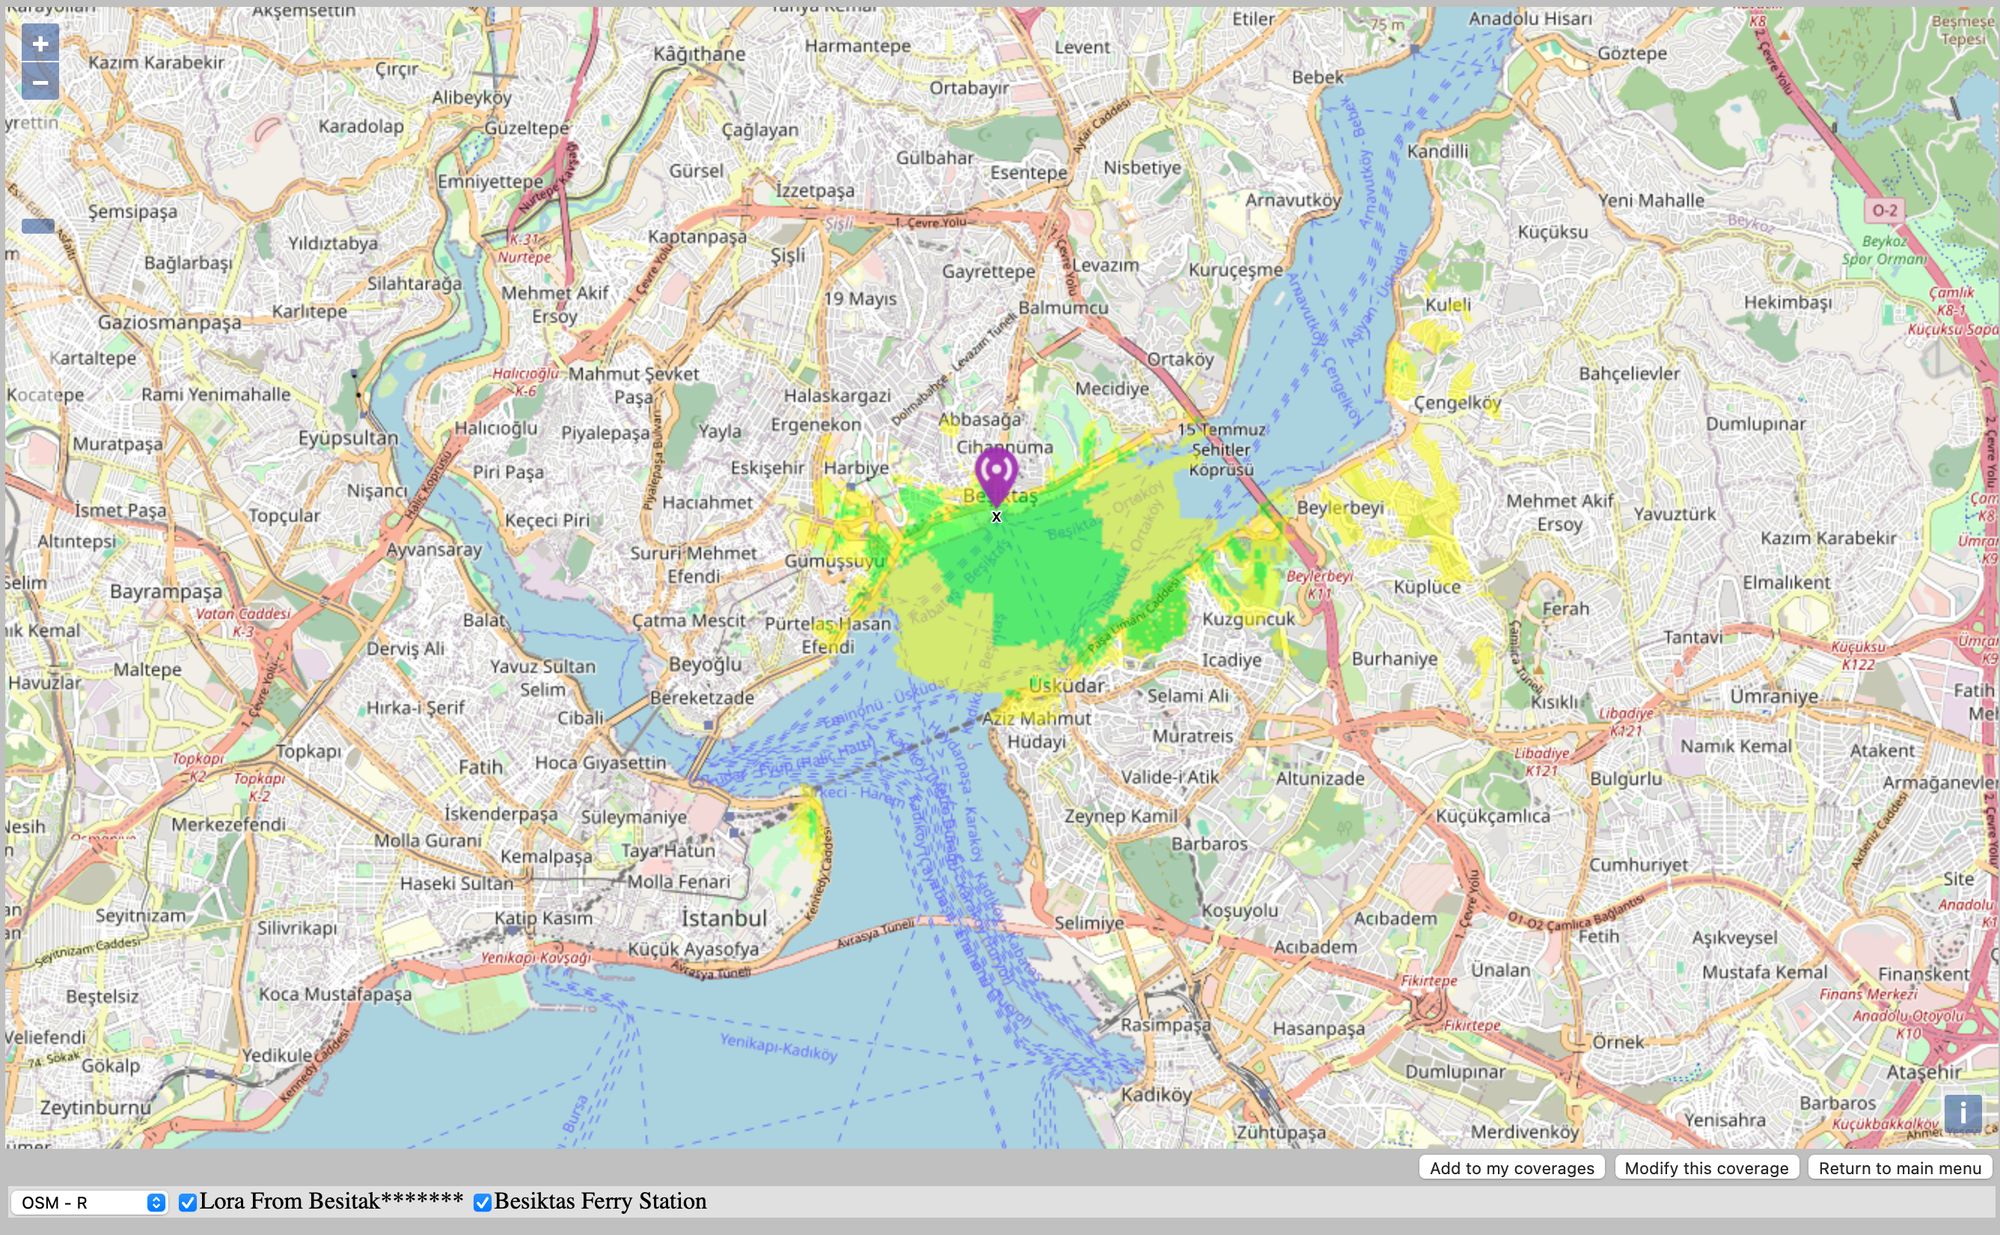
Submit and Simulate
- Click submit to generate a map based on your settings.
- The map provides a simulation preview of the coverage based on entered settings.
Modify Parameters if Needed
- Click "Modify this coverage" to tweak settings.
- After adjustments, submit again.
Save Your Coverage
- Click "Add to my coverages" once done.
Viewing Your Coverages
- Return to the main menu, head to "My Coverages"
- Select your coverage from the drop-down and click "View This Coverage."
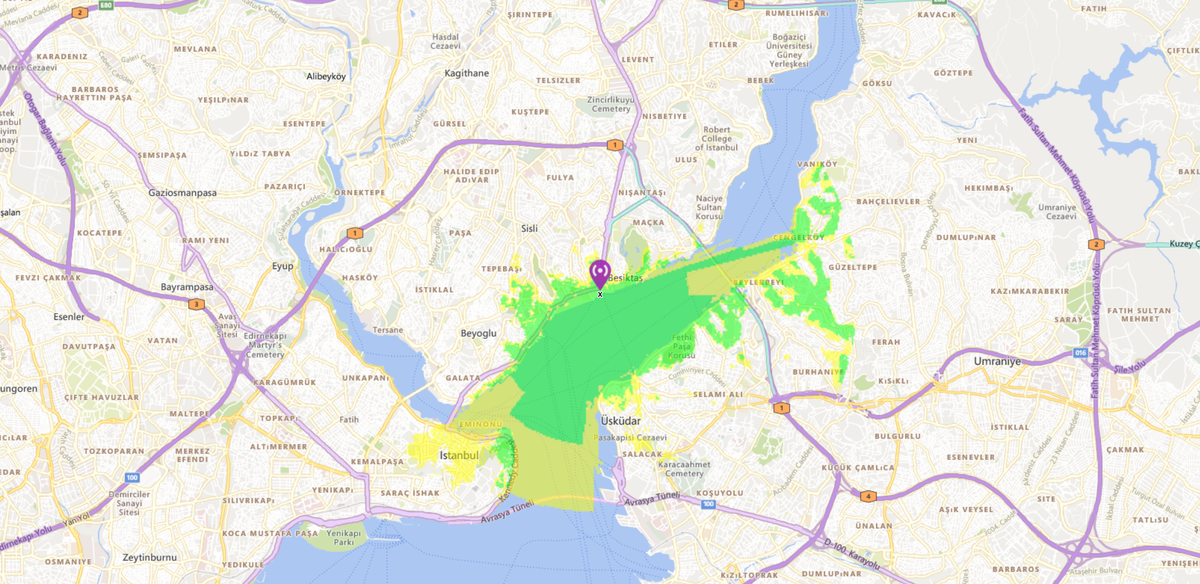
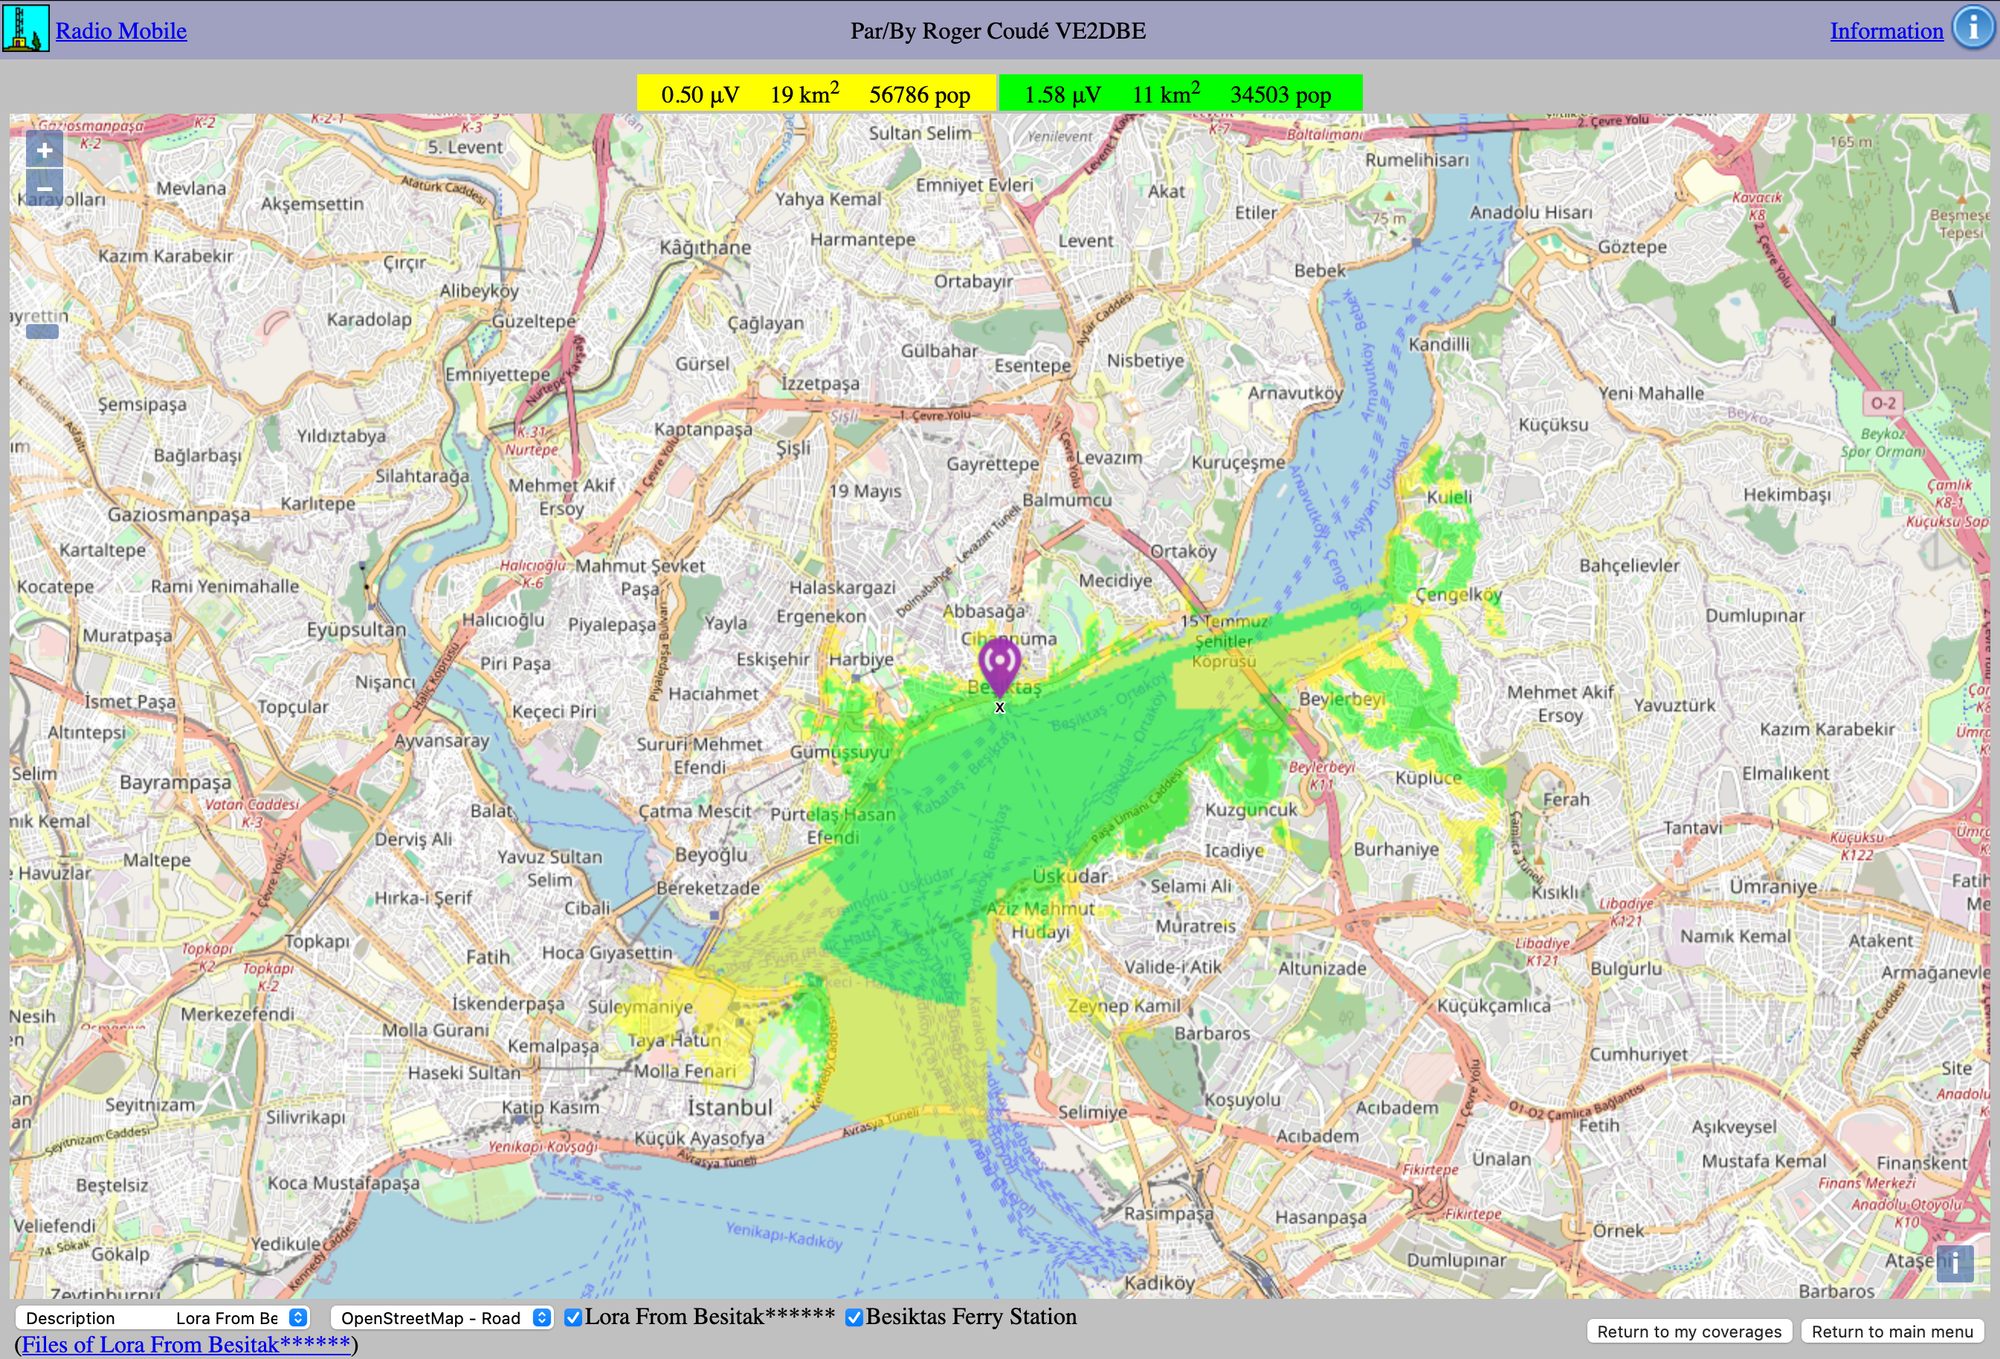
The big difference we noticed between the Map Preview page and the "View My Coverage" page is the reach metric. On our map, it shows that our devices can talk to each other up to 19 kilometers away, and within 11 kilometers, the communication is really good. So, if you see something like "Up to 19KM with 11KM of good coverage," it means our devices can chat well within an 11-kilometer circle, and they might even say hello up to 19 kilometers away. This helps us decide where to put our devices for the best connection.
Conclusion: Crafting a Powerful Meshtastic Network
In this guide, we've ventured into the world of Meshtastic, using a nifty tool to create coverage maps for our Lora nodes. Coverage maps, acting as our communication compass, play a vital role in optimizing the range of Meshtastic devices, providing a visual guide to signal strength and coverage areas in the expansive realm of a LoRa mesh network. Recognizing the approximate accuracy of 80% to 90% in our tests, we emphasized the importance of local validations before extensive expeditions. Meshtastic, like any technology, operates within the realms of real-world conditions. Terrain, obstacles, and environmental factors can influence communication performance. As we plan our node placements we should maintaining a realistic perspective.