Creality Ender-3 V3 SE: Pre-Printing Checklist and Setup Guide
Welcome to our comprehensive guide on setting up and optimizing the Creality Ender-3 V3 SE, ideal for 3D printing enthusiasts.
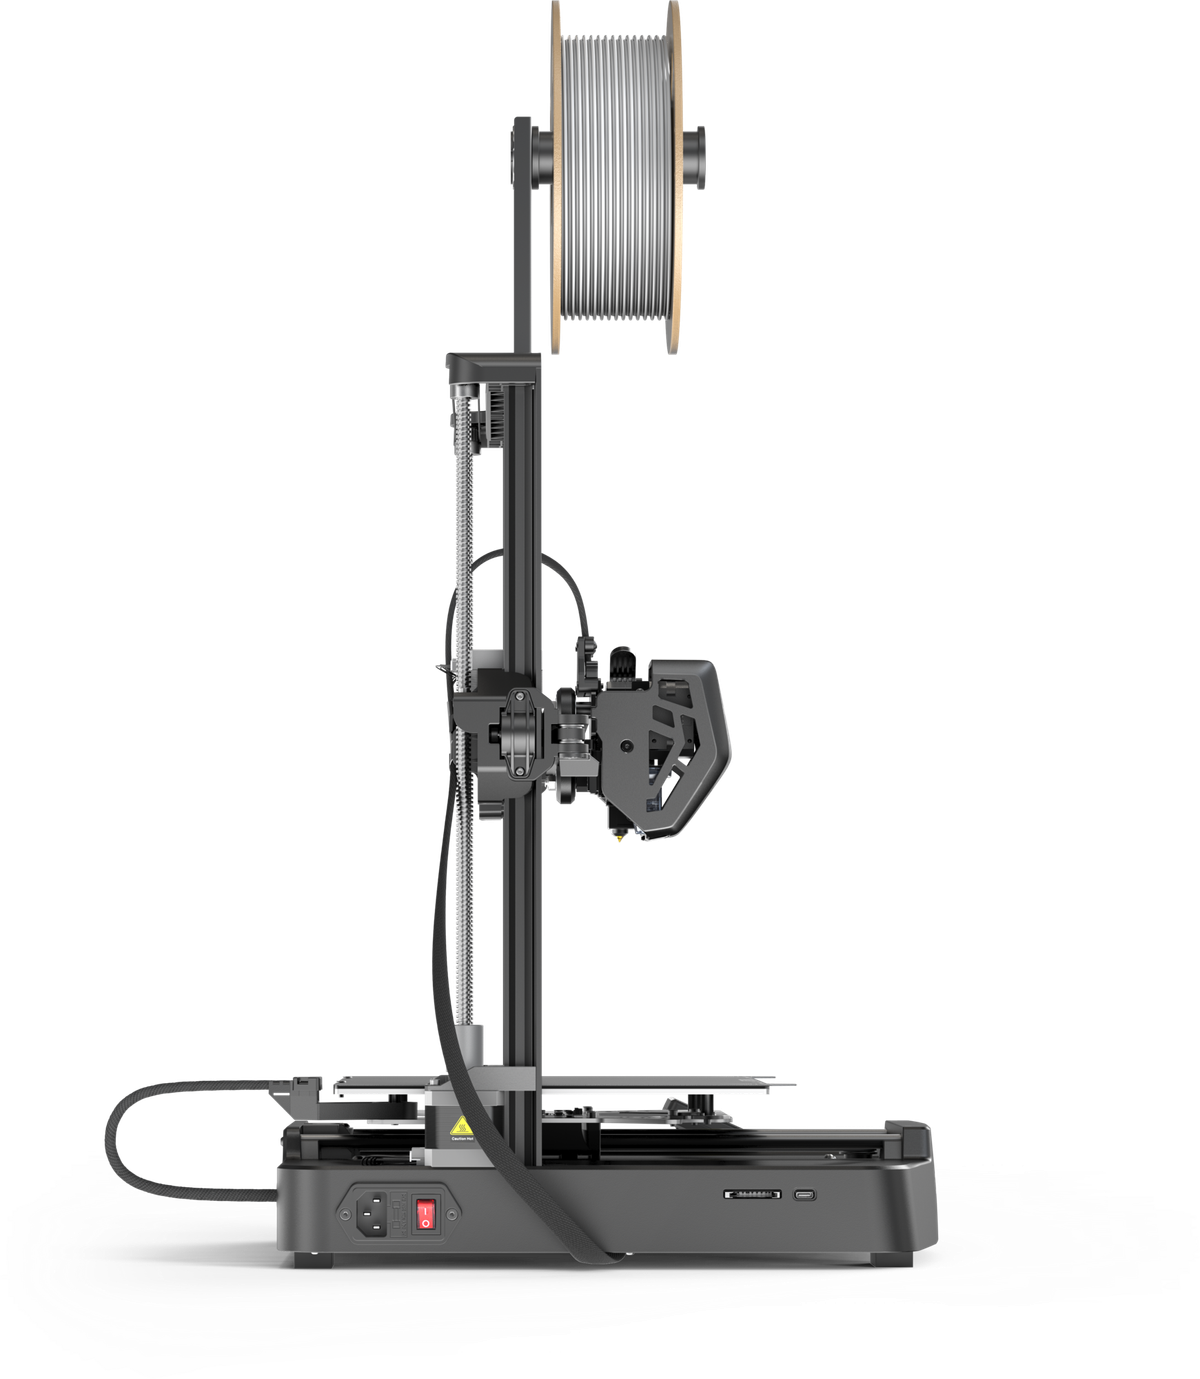
Welcome to our comprehensive guide on setting up and optimizing the Creality Ender-3 V3 SE, the ultimate choice for both novice and experienced 3D printing enthusiasts. In this detailed walkthrough, we'll cover essential steps to take before your first print, ensuring you get the most out of your new printer.
Setting Voltage
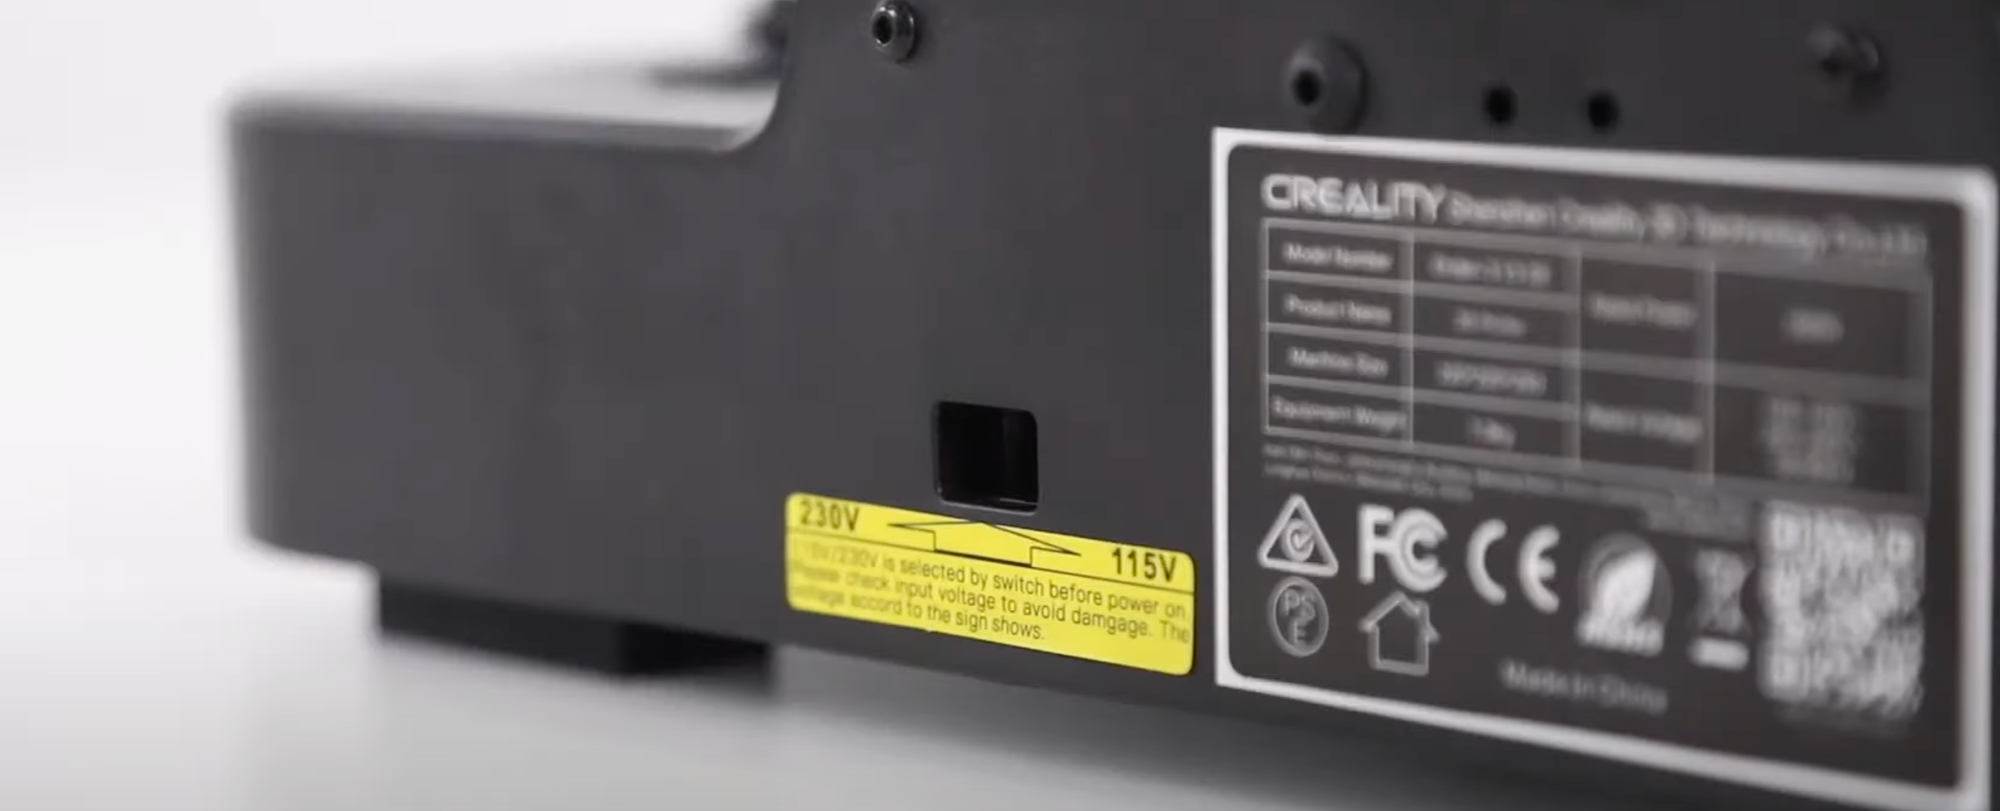
Ensure that the printer's voltage settings are correctly configured for your region:
- Locate the voltage switch on the power supply unit.
- Set the voltage to either 115 volts (for the United States) or 230 volts (for Europe) as per your region. Incorrect voltage settings can result in electrical issues and potential damage to the printer.
Adjusting Eccentric Nut on X-Axis Print Head Assembly
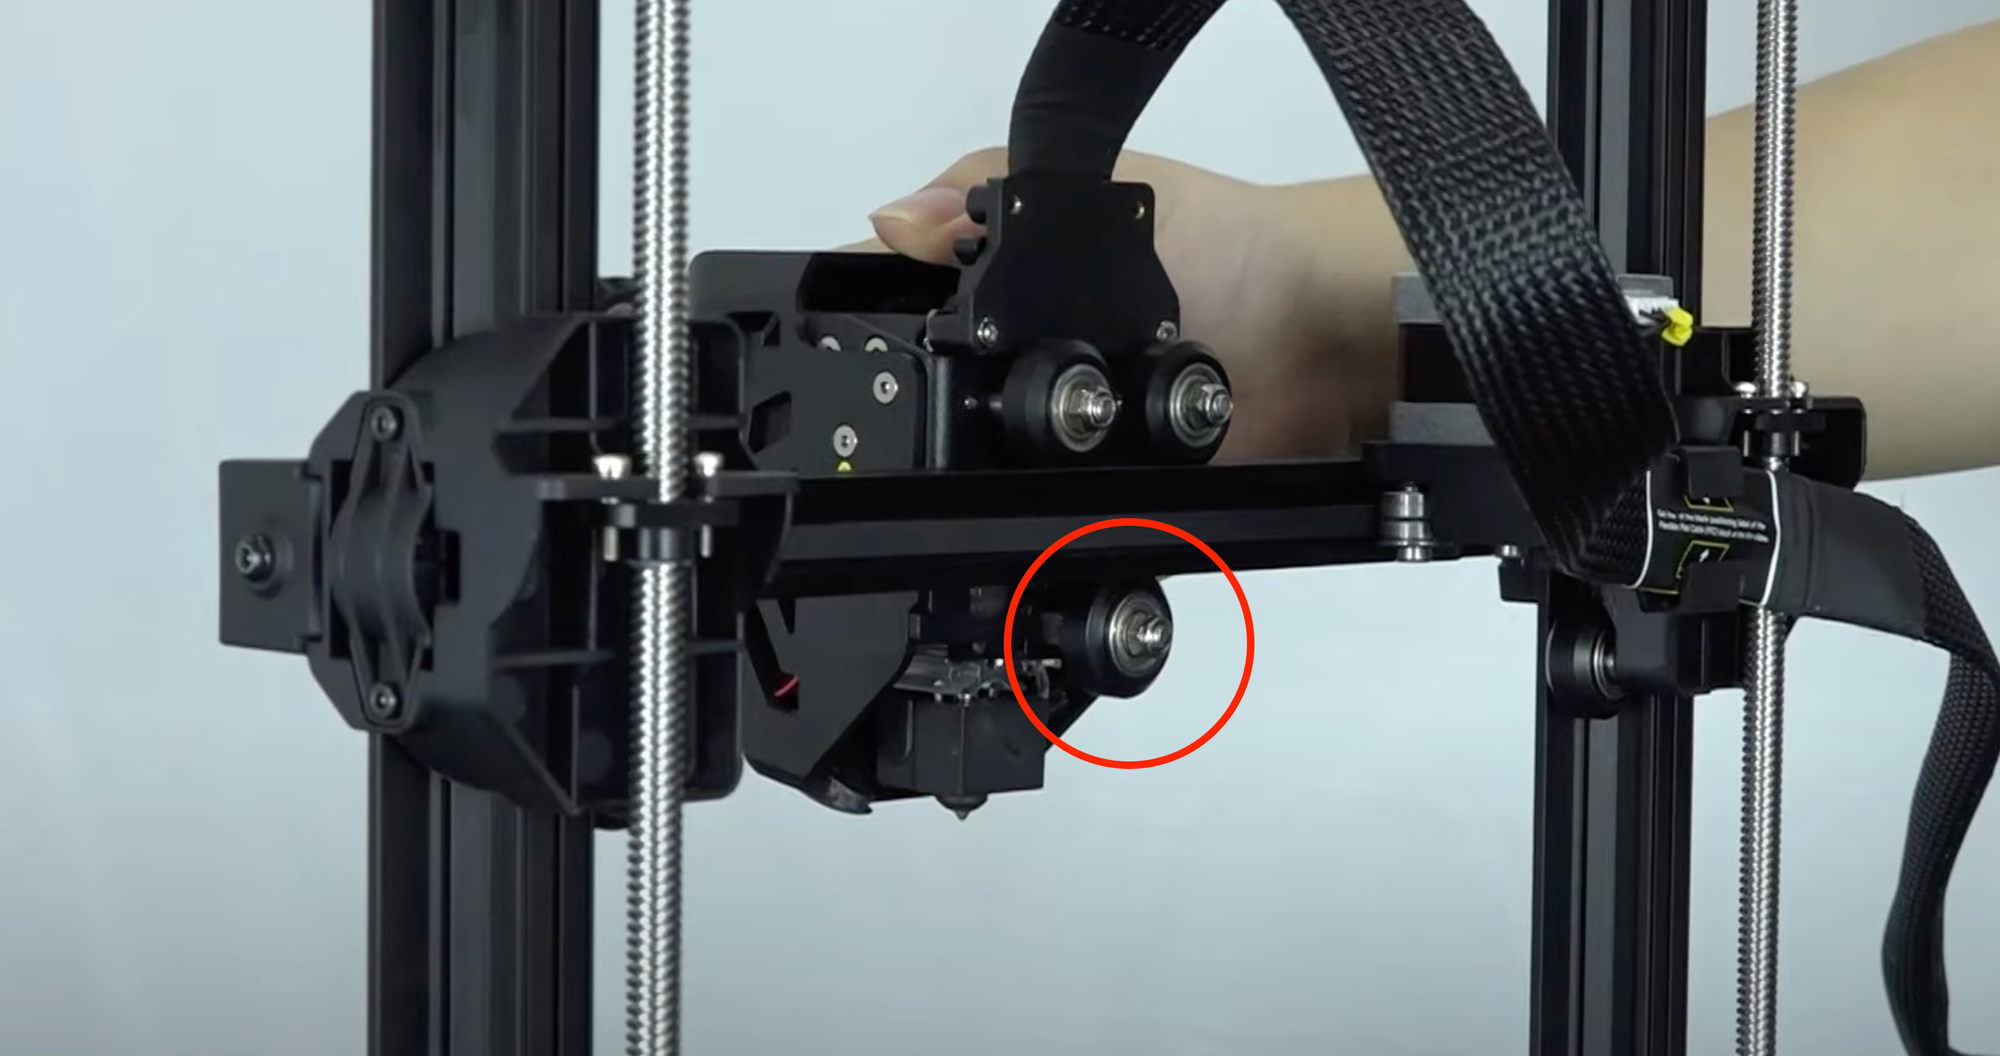
Before diving into printing, it's crucial to ensure proper alignment of the print head assembly:
- Locate the eccentric nut on the x-axis print head assembly.
- Adjust the nut to ensure proper tension and alignment of the print head assembly. This step is essential for smooth movement and accurate prints.
Stabilizing the Print Bed
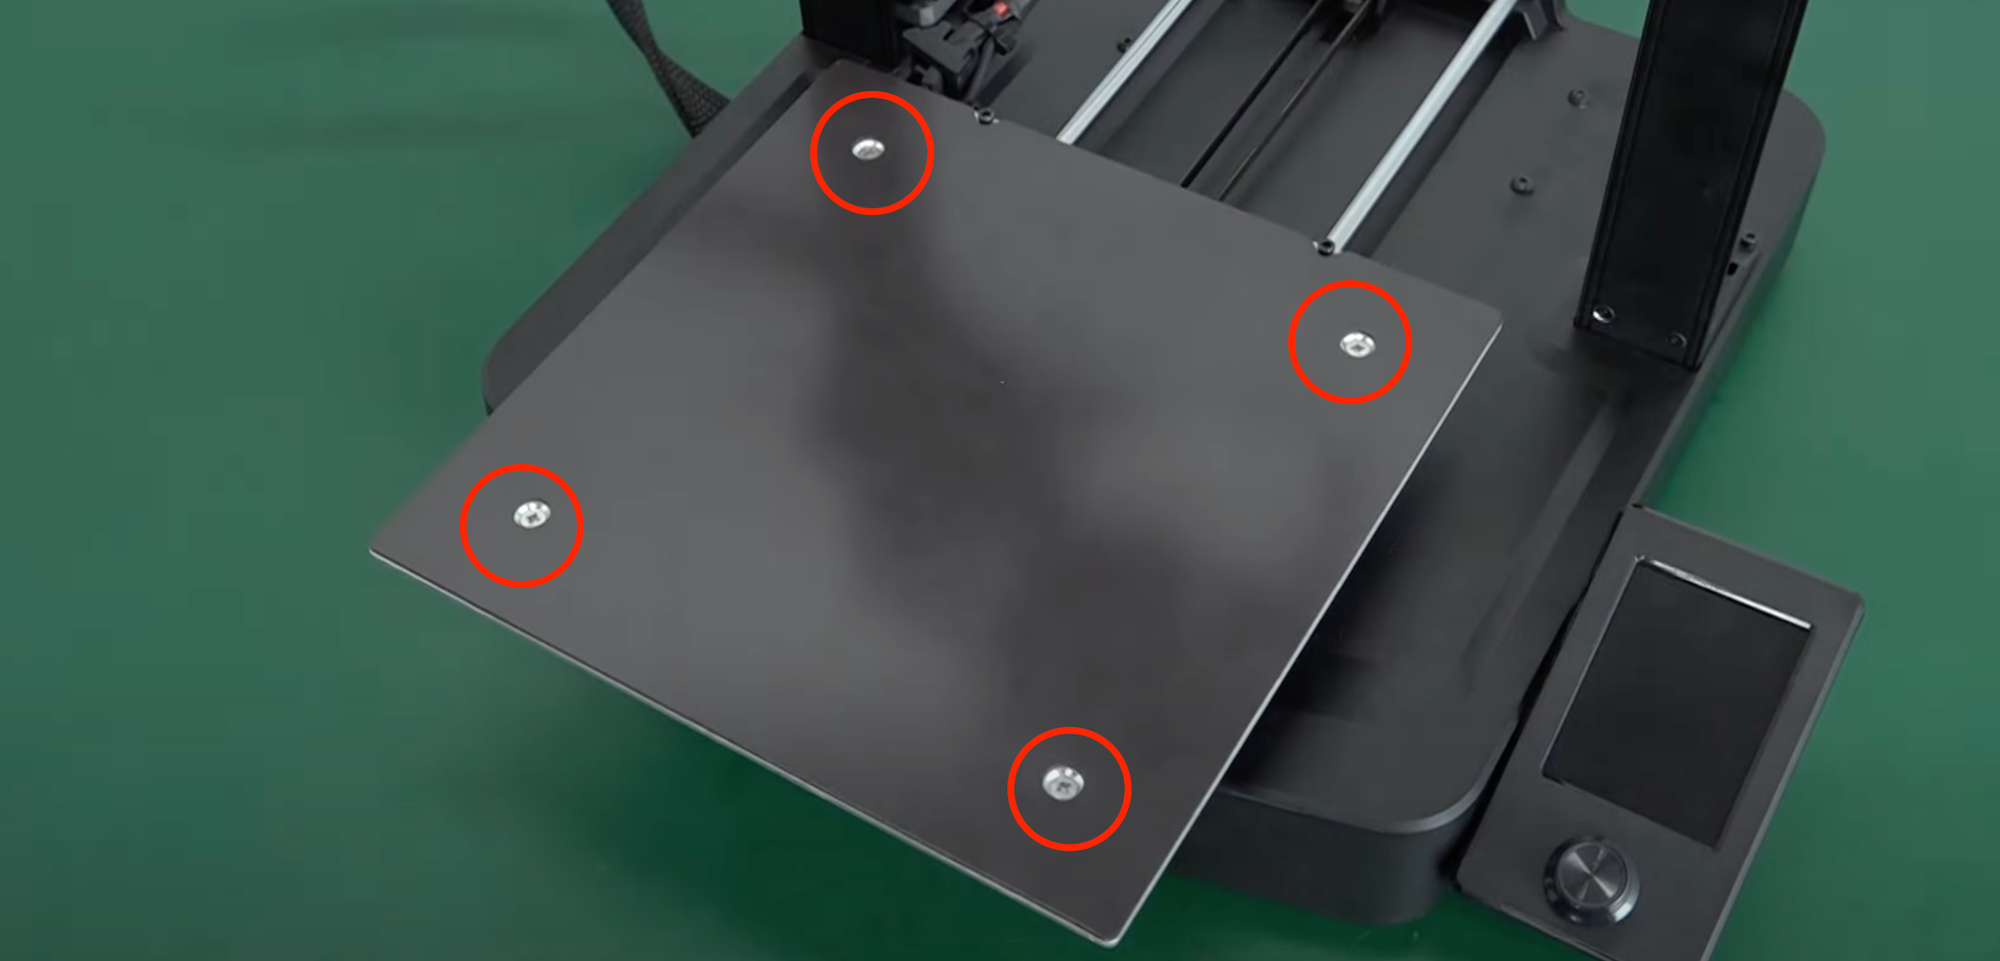
A stable print bed is essential for successful 3D printing. Follow these steps to ensure stability:
- Remove the magnetic sheet from the print bed.
- Tighten all four screws located underneath the bed to eliminate any wobbling or instability. A stable print bed ensures precise layer adhesion and print quality.
Checking Belt Tension

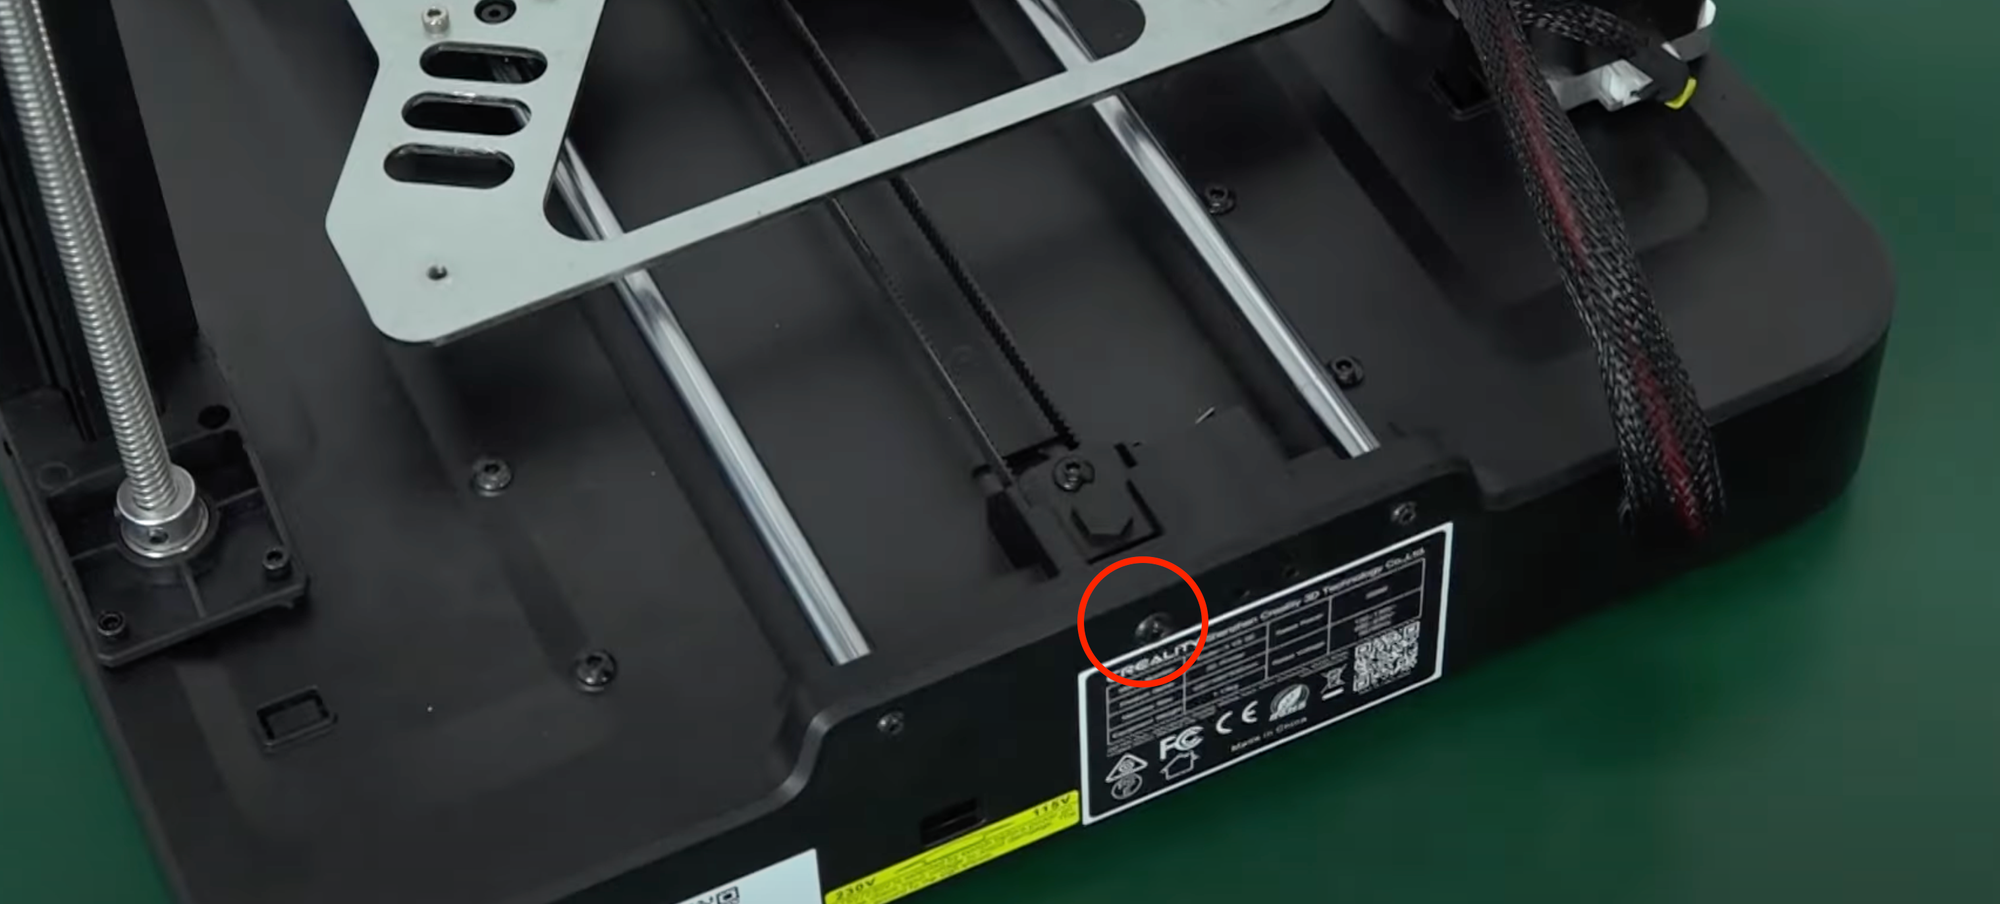
Proper belt tension is crucial for smooth movement and accurate prints. Follow these steps to check and adjust belt tension:
- Inspect the tension of the Y-axis and X-axis belts.
- Use a hex wrench to adjust the tension by tightening the nut on the back of the belt slightly. Be sure not to over-tighten, as this can cause excessive friction and wear.
X-Axis Leveling
Refer to the provided service tutorial for adjusting the X-axis leveling. This ensures proper alignment and stability of the print head assembly, leading to accurate prints.
Perform Lubrication and Maintenance
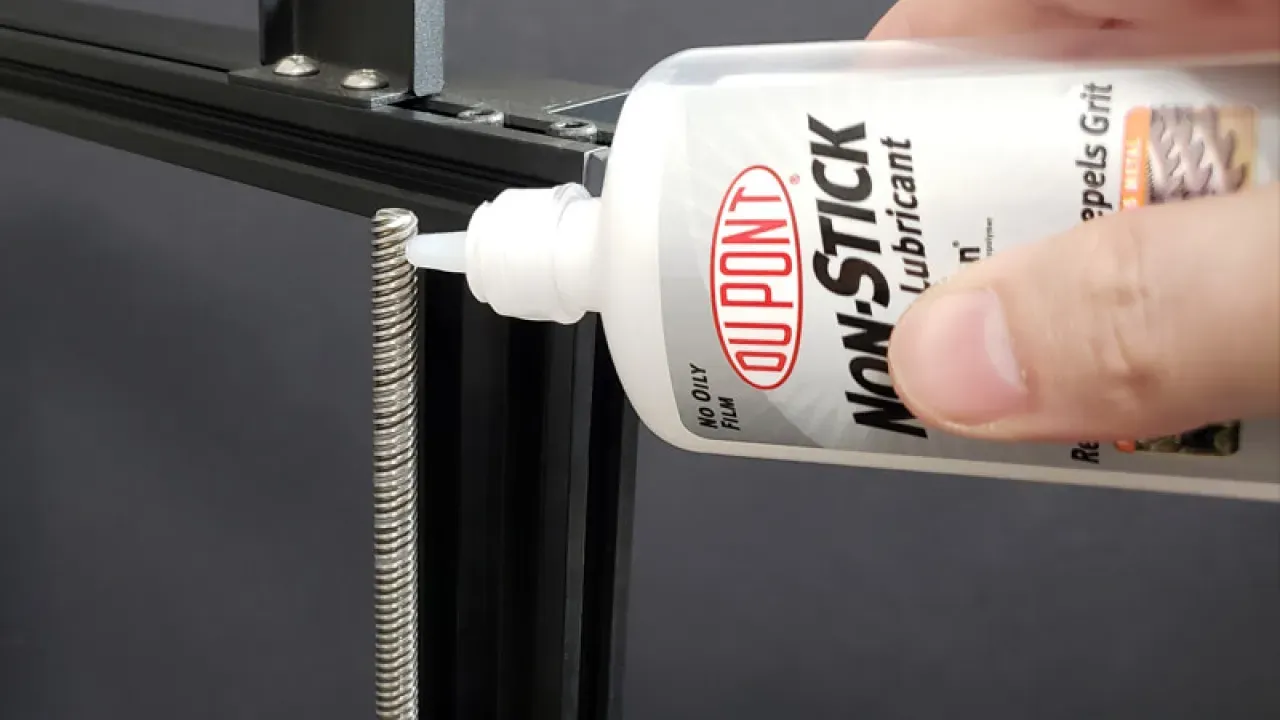
Before your first print, perform essential maintenance tasks to keep your printer in top condition:
- Apply lubricant to the printer's moving parts, such as rods and lead screws, to ensure smooth operation.
- From the screen go to Control Then Move
- Move the print head on all directions to help spread the lube
- Regularly perform maintenance checks and cleaning to prevent build-up of debris and ensure optimal printer performance.
Auto Z Axis and Bed Leveling
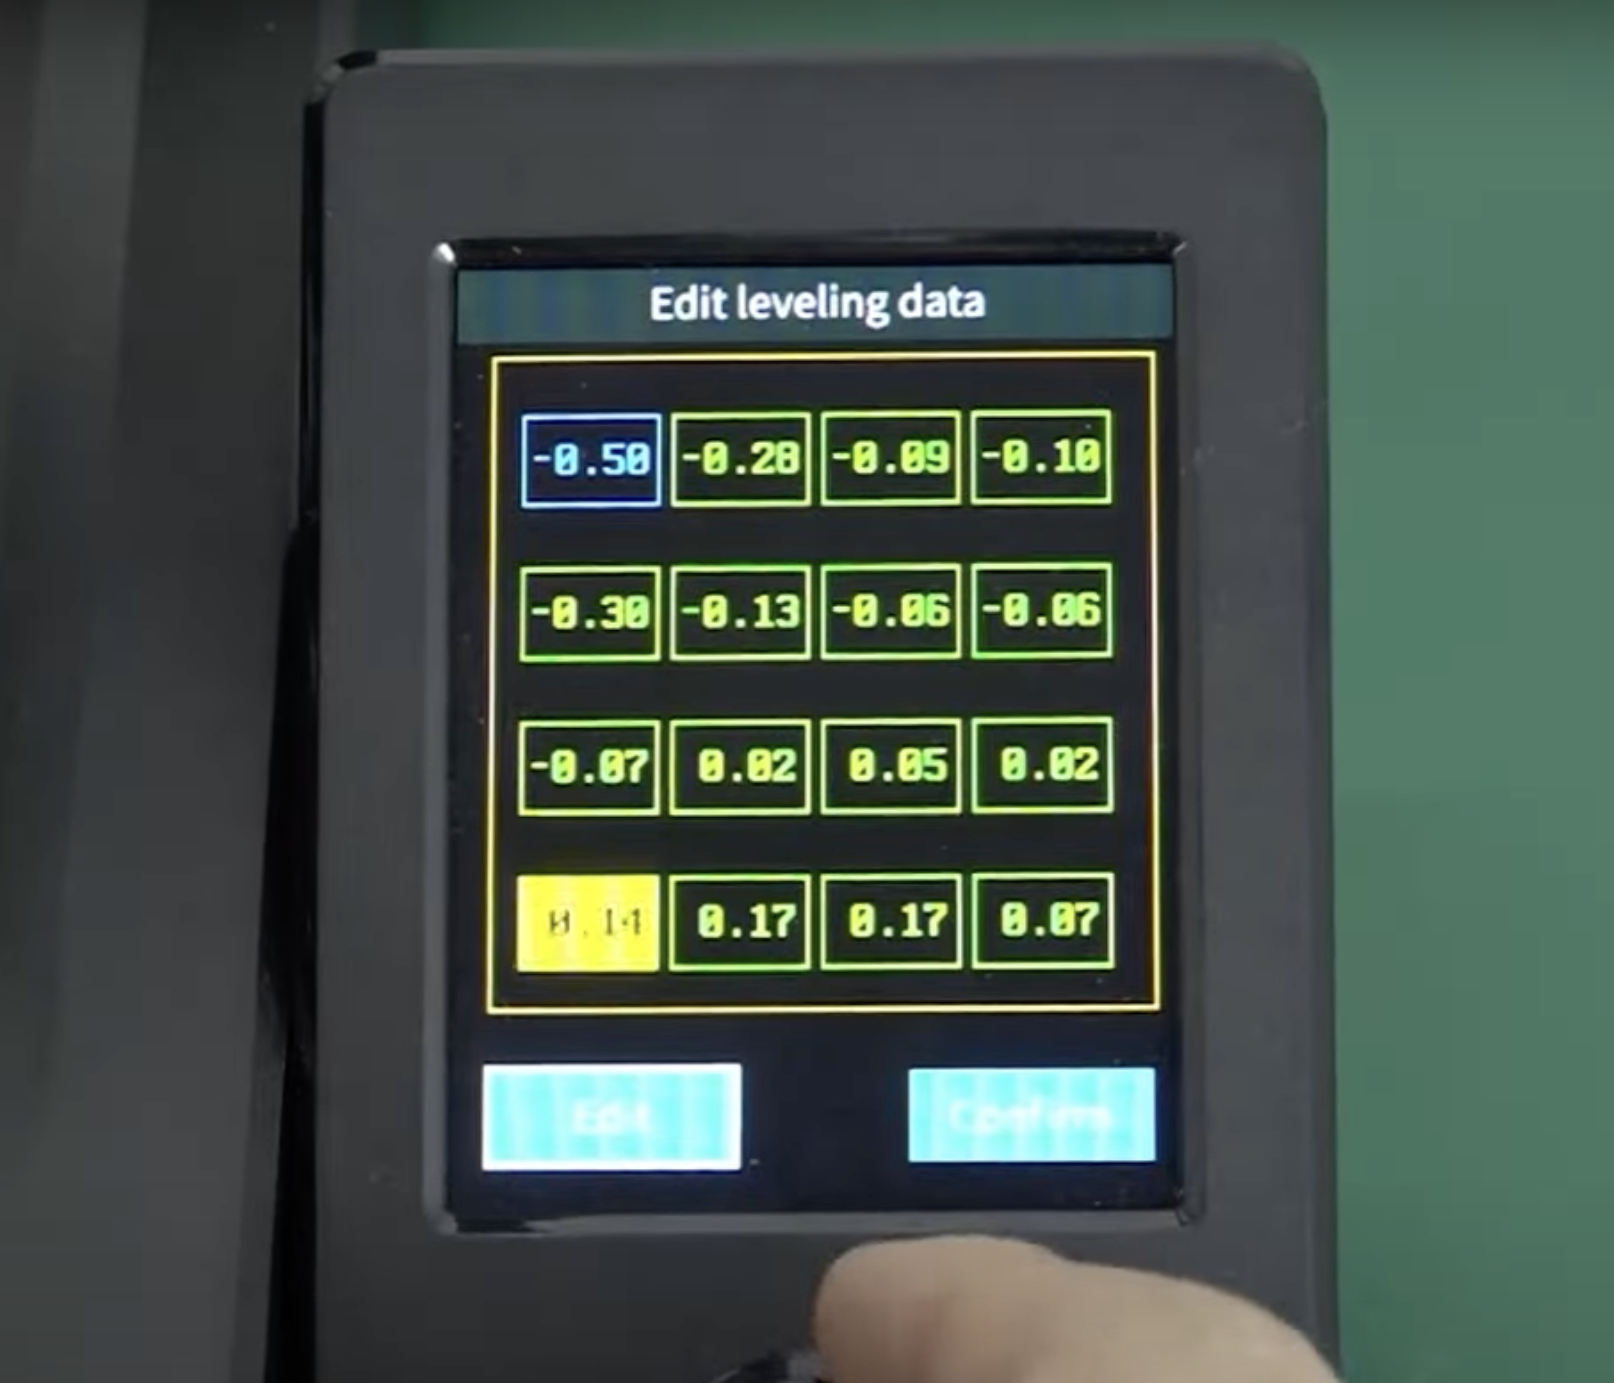
The Creality Ender-3 V3 SE features auto bed leveling and auto Z offset capabilities for effortless setup. Perform the following steps to calibrate these settings:
- Access the auto bed leveling function in the printer's menu.
- Follow the on-screen prompts to initiate the auto bed leveling process. Ensure that this calibration is done without filament on the print bed to prevent any interference.
- Once the bed leveling process is complete, the printer will automatically adjust the Z offset for optimal first-layer adhesion.
By following these steps, you'll be well-prepared to embark on your 3D printing journey with the Creality Ender-3 V3 SE. Stay tuned for our next guide, where we'll walk you through the printing process and share tips for achieving exceptional print quality. Happy printing!