How To Build Meshtastic Node With Raspberry Pi Pico W With Lora Hat
Learn how to build your own Meshtastic LoRa Node using a Raspberry Pi Pico W and a LoRa Hat. This DIY guide covers everything from hardware requirements to assembly and software flashing. Save money and enjoy a rewarding hands-on experience by repurposing old components or starting from scratch
In this guide, we'll show you how to build your own Meshtastic LoRa Node using a Raspberry Pi Pico W and a LoRa Hat. While you could easily buy a pre-made device, building one yourself from spare parts offers a rewarding hands-on experience. Whether you're repurposing old components or just love DIY projects, this guide will help you create a functional, off-grid communication node using open-source software.
Hardware
Now let's get started with the hardware you need:
- 1x Raspberry Pi Pico w Board RP2040 Soldered Row Pins - AliExpress Price 2.68USD | Amazon US Price 11.99USD
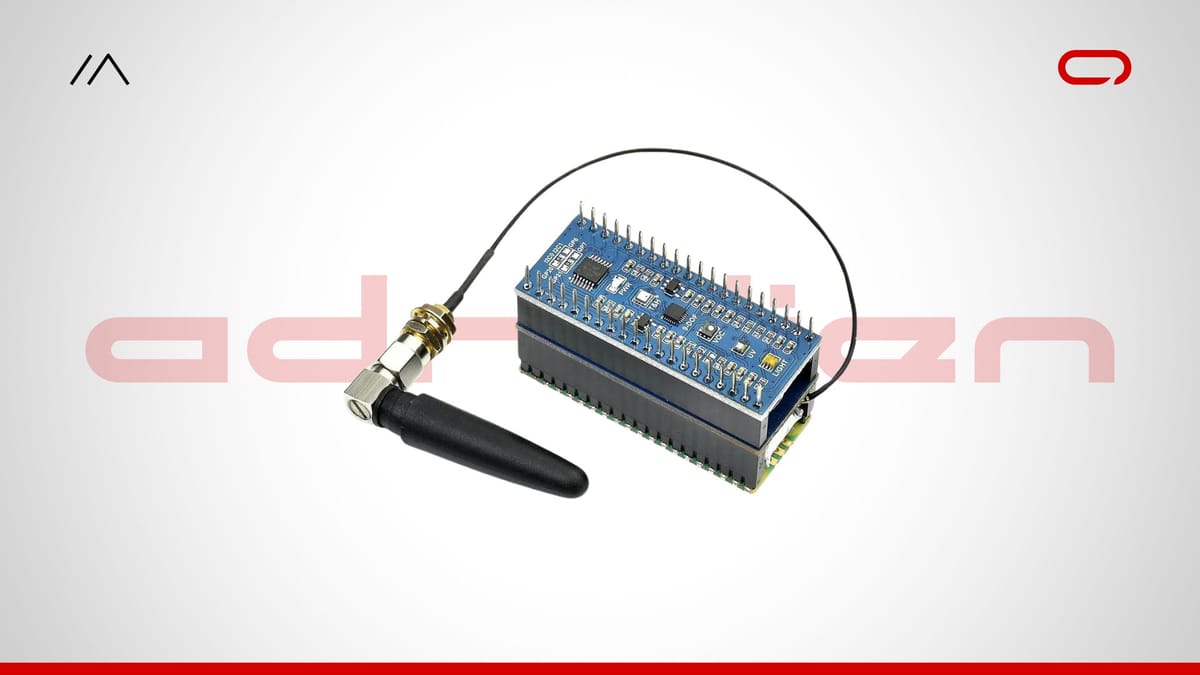
- 1x WaveShare SX1262 LoRa Node Module For Raspberry Pi Pico (Choose The Correct Frequency For Your Region) - AliExpress Price: 11.80USD | Amazon US Price 23.99USD
 Adrelien
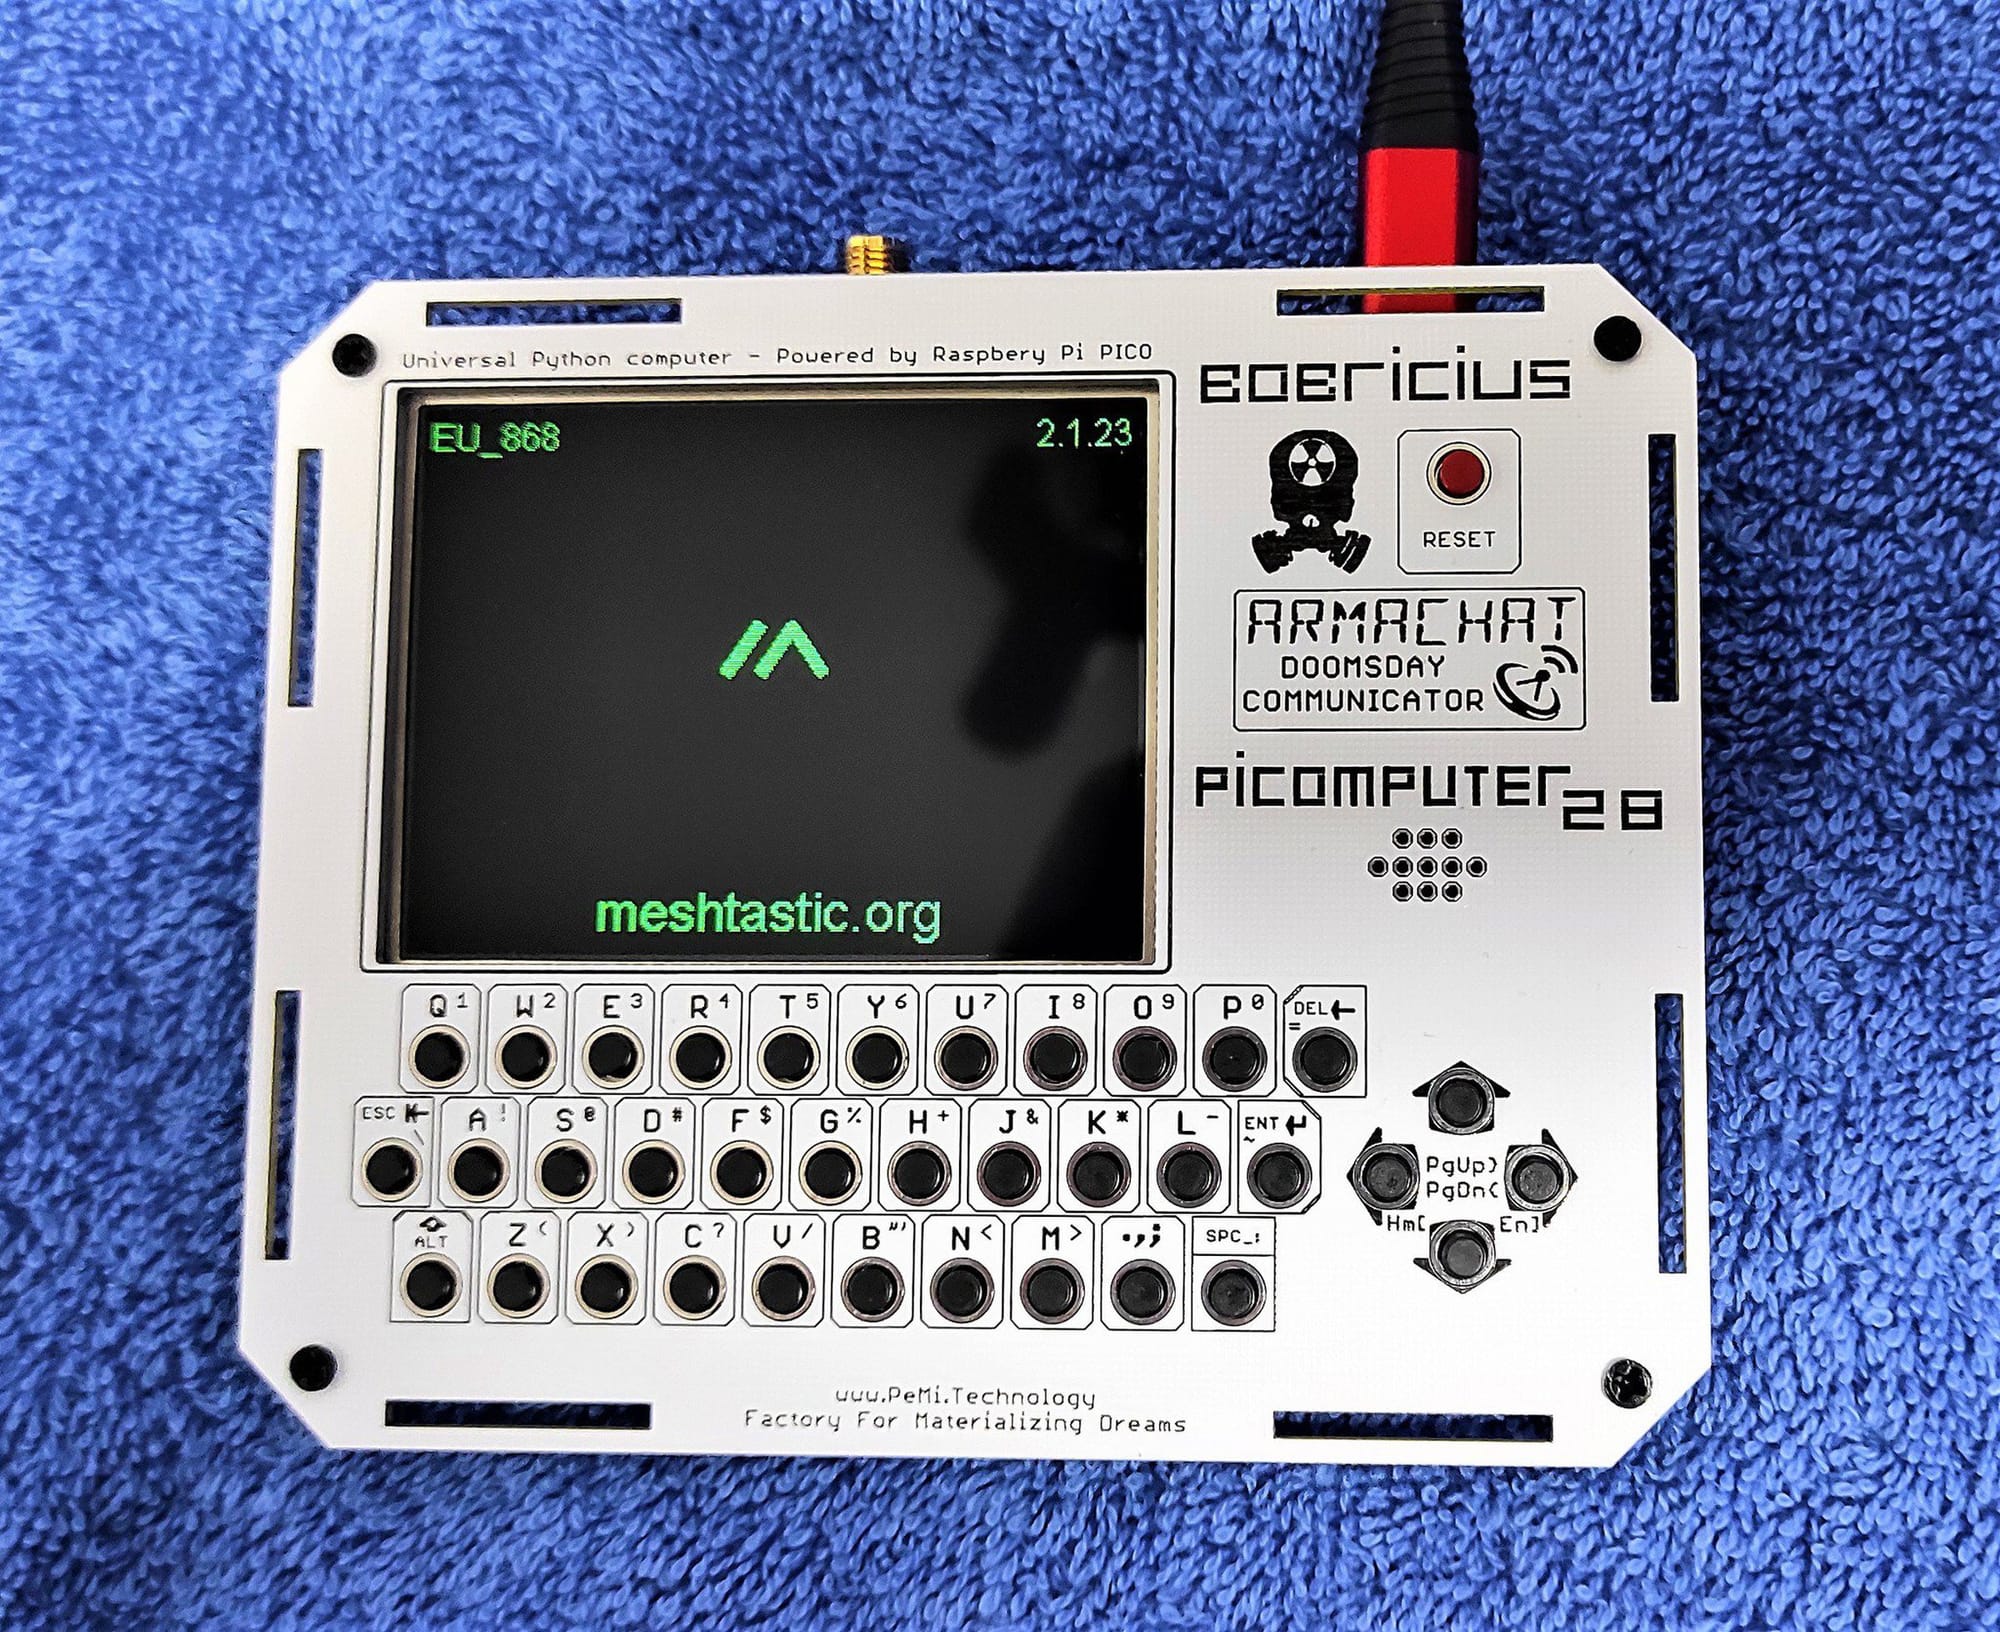
Assembly
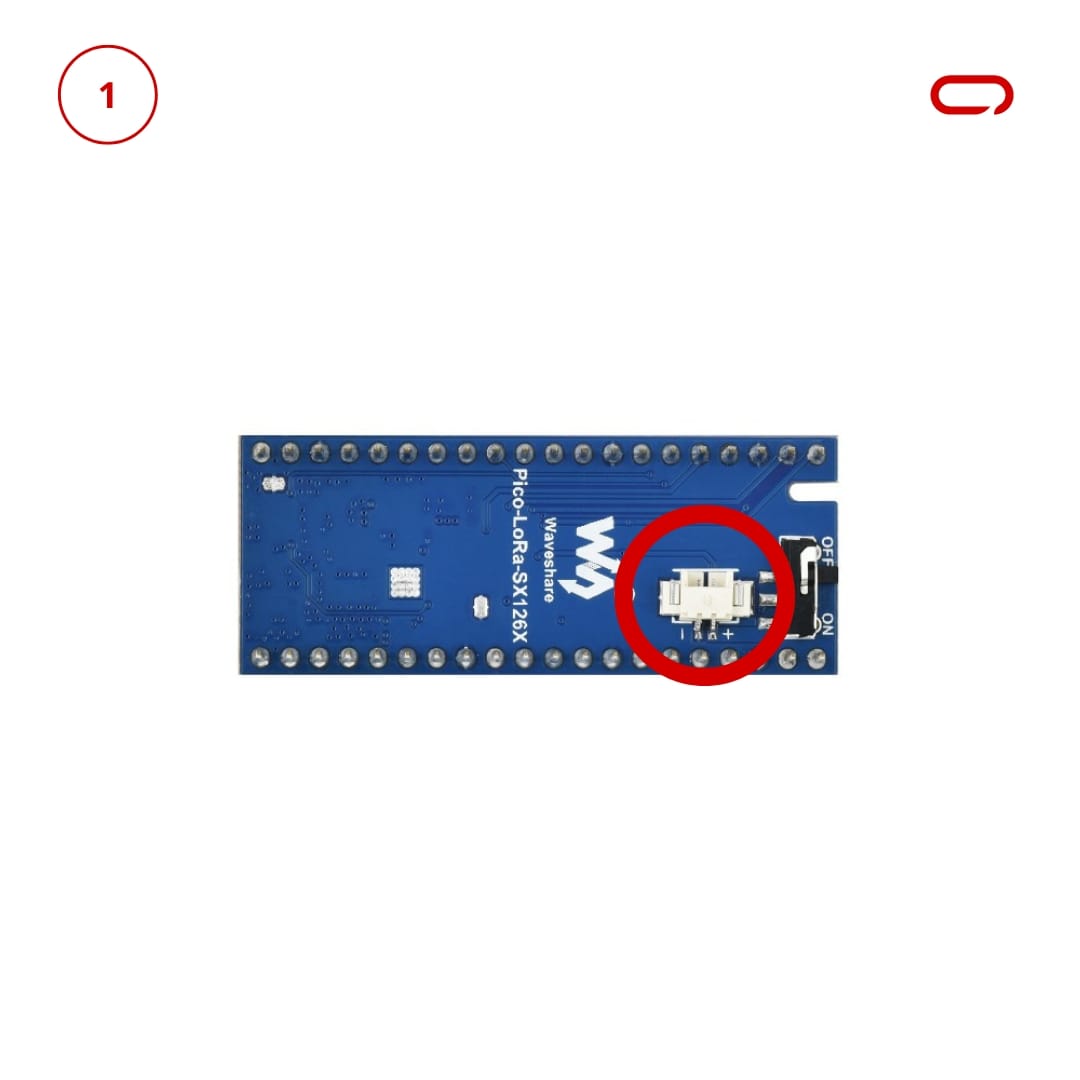
- Connect the Battery:Take the included battery and connect it to the PH1.25 battery header on the LoRa hat.
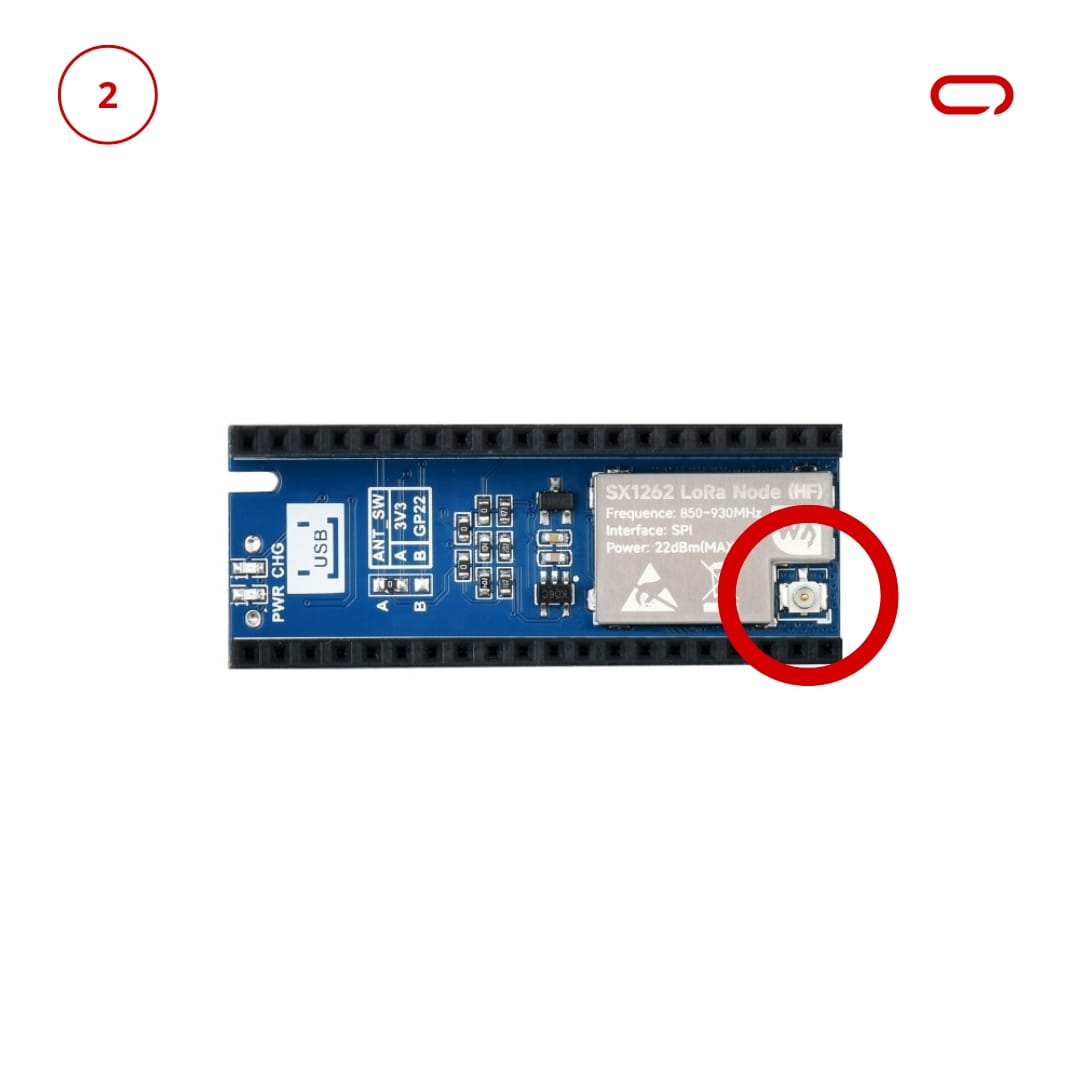
Attach the SMA Connector and Antenna:
- Attach the included SMA connector to the LoRa hat.
- Screw in the antenna to the SMA connector.
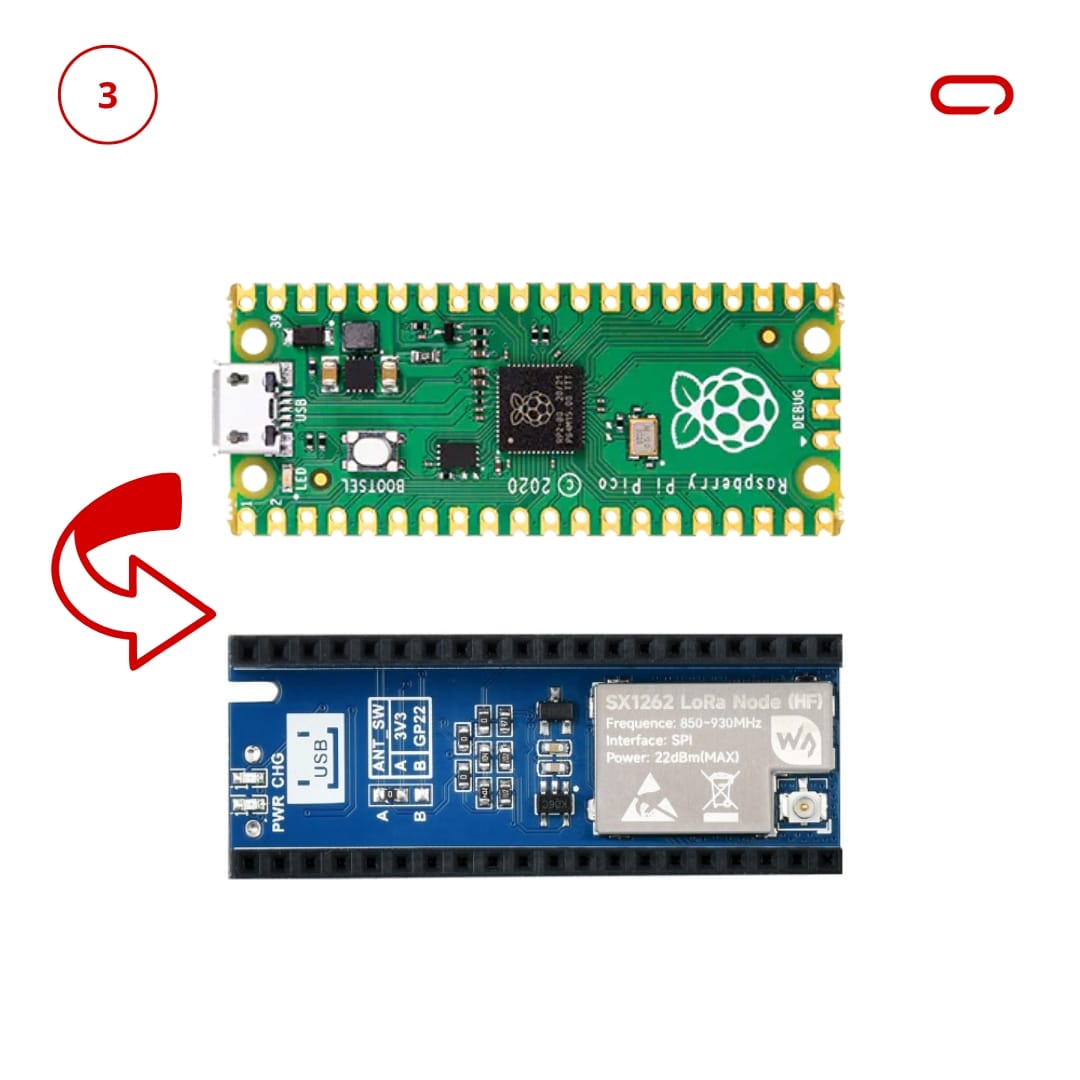
Install the Raspberry Pi Pico W:
- Place the Raspberry Pi Pico W on top of the LoRa hat.
- Ensure that the pins are correctly aligned.
- Pay attention to the orientation: the USB port of the Raspberry Pi Pico W should be positioned away from the antenna.
Flashing The Software
The Web-Based Installer requires either Chrome or Edge browsers but is an excellent choice for quickly flashing devices.
- Plug in your device
- Visit flasher.meshtastic.org *requires Chrome or Edge browser
- For the device, we will go with Raspberry Pi Pico W
- Choose the latest stable version
- Click on Flash
The CLI Script is considered the "manual process" for flashing firmware. If the web-based flasher doesn't work, an alternative option is to use the CLI (Command Line Interface) script. While we won't cover it in detail in this guide, you can refer to the Meshtastic Guide for comprehensive instructions.
Adrelien
Creating your own Meshtastic LoRa node with a Raspberry Pi Pico W and a LoRa Hat is a rewarding project. You get the hands-on experience of building something yourself. It's a great way to make use of parts lying around and enjoy the process of DIY electronics. Now, with your Meshtastic LoRa node up and running, you can explore the possibilities of mesh networking and see firsthand the benefits of your work. Happy tinkering!