Meshtastic DIY - How To Build Your Own Meshtastic Node ESP32 & Lora Radio
Create your own Meshtastic LoRa Node with our easy DIY guide. A complete step-by-step for building your customized mesh communication system
In this guide, we'll show you how to build your very own Meshtastic LoRa Node. While you could buy a Heltec V3 for just $15, if you have some spare boards from old projects or simply enjoy the hands-on experience of building things yourself, this guide is perfect for you.
 Adrelien
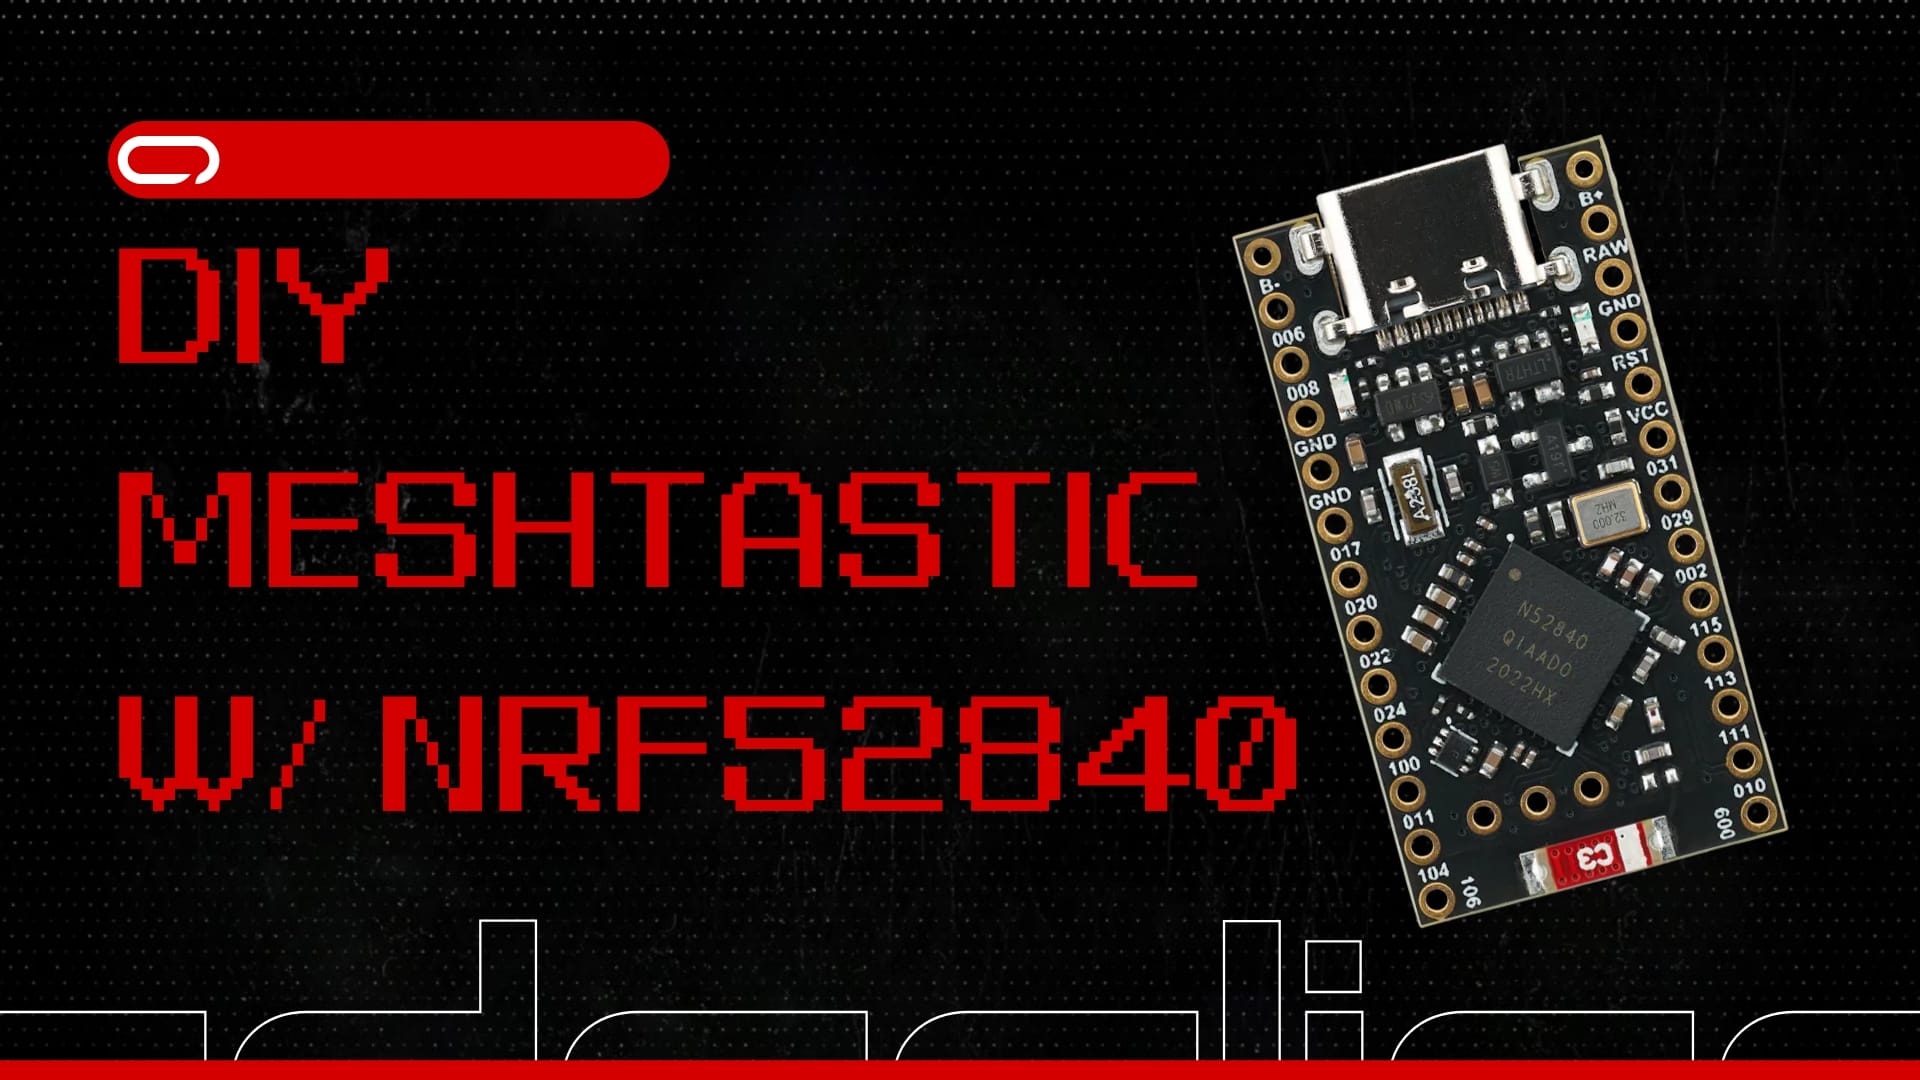
Hardware
Now let's get started with the hardware you need:
- 1x ESP-32S WiFi + Bluetooth Devkit V1 (30 PIN) - AliExpress Price 3.82USD
- 1x 433 Mhz LoRa Module Ra-02 DIP - AliExpress Price: 3.72USD | 868/915 Mhz LoRa (We did not test it & It is SMD, very small and hard to work with & No IPEX Support) - AliExpress Price: 5.15USD
- x1 GIZONT 433 Mhz 10 dbi Gain (Optional but Highly Recommended) - AliExpress Price: 11.16USD For Pair Short & Large (Tested with ~1.5 KM Range In High-Density City No LOS) - Single Antenna - AliExpress Price: 4.88USD - 5.58USD
- x1 IPEX to SMA-K (If you decide to go with Antenna) - AliExpress Pirce: 2.95USD
- 14x Female to Female Pin Connector - AliExpress Price: 0.42USD
- 0.96 inch I2C OLED - AliExpress Price: 1.29USD (Optional but you will need Serial Connection to Pair)
- 4x Female to Female Pin Connector (If you decide to go with screen)
- 1x Soldering Iron + 60/40 Solder Wire (Optional - You can go to a nearby electronic shop to solder the Lora header on the board)
ESP-32S WiFi + Bluetooth Devkit V1
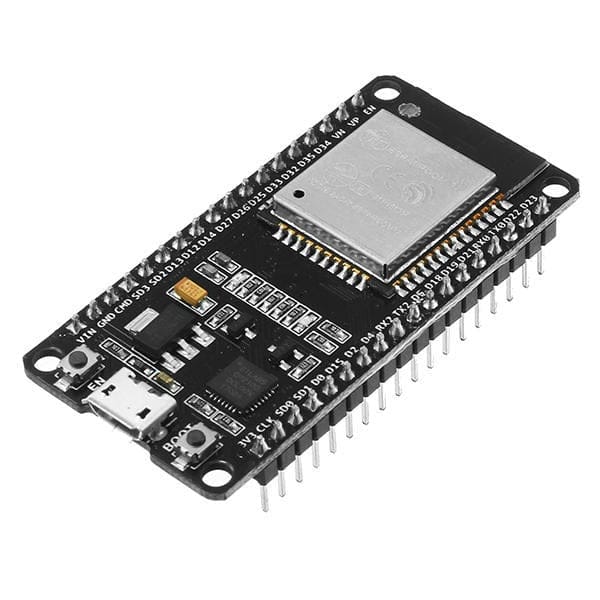
We’ve chosen the ESP-32S WiFi + Bluetooth Devkit V1 (30 PIN), a compact and versatile board. If you're planning to add multiple sensors, you might want to opt for the 38-pin version. Make sure to get a board with pre-soldered headers for convenience. These boards come in both USB Type-C and Micro USB variants, so choose the one that matches the cables you already have.
LoRa Module Ra-02 DIP
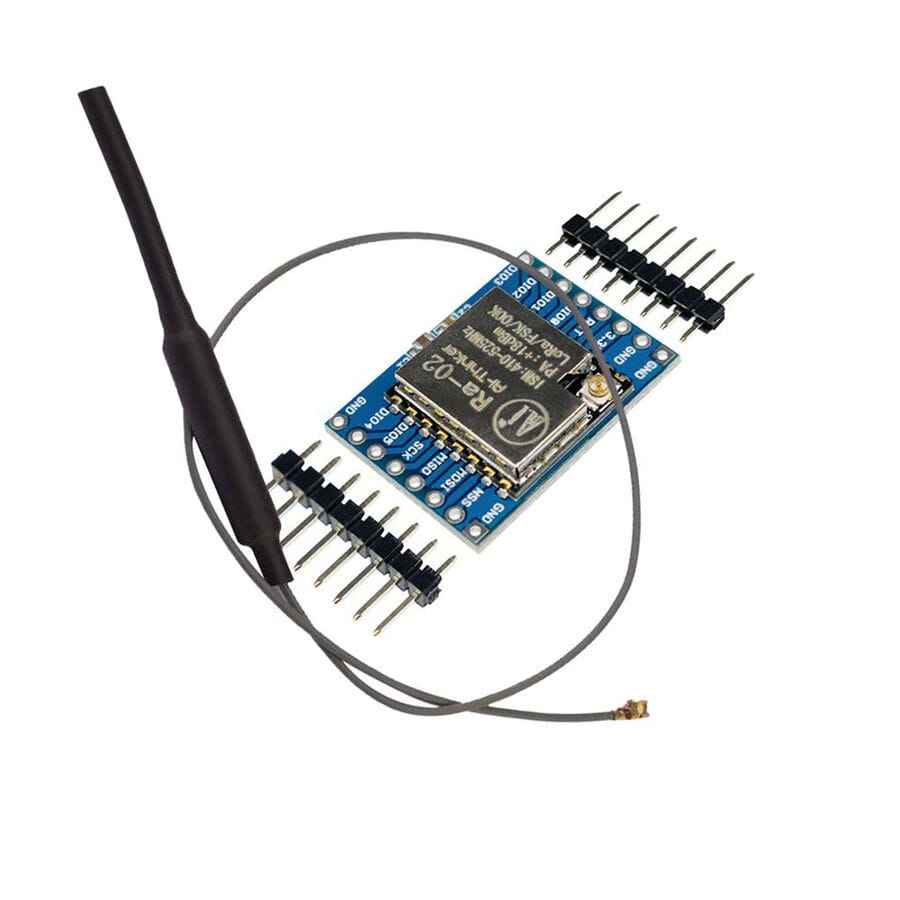
When it comes to the LoRa chip, many options are sold as Surface Mount Components (SMCs), which are very small and can be challenging to handle without damaging the board. For this reason, we opted for the RA-02 DIP version. This version is mounted on an adapter board, giving you easy access to all the pins and making it as simple as building with Lego blocks. Keep in mind that you'll need to solder the headers to the board.
To keep costs low, consider checking with your local electronics shop—they may offer soldering services, saving you the hassle and expense of purchasing soldering equipment.
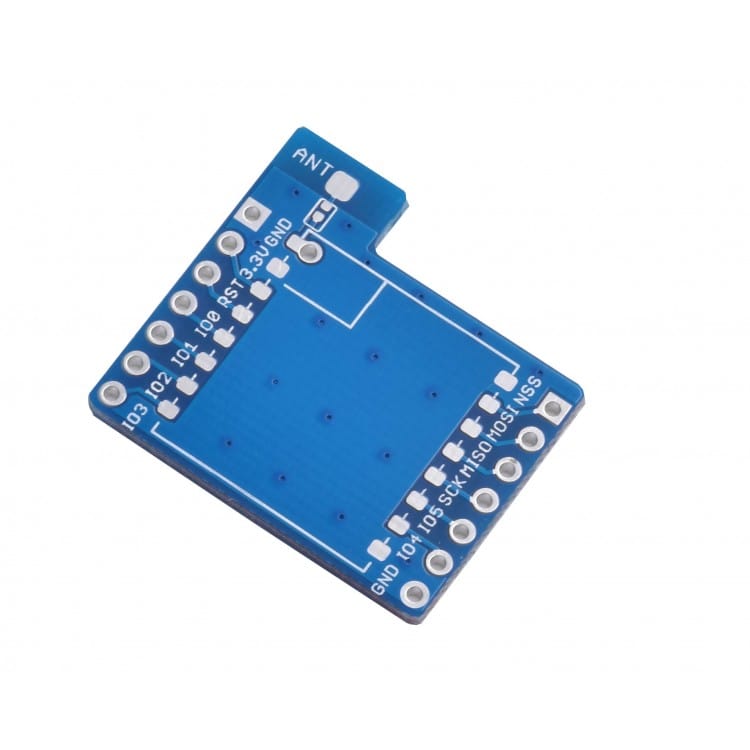
If you want to use a different frequency, you may not find a DIP version (with pins) readily available. In that case, you'll need an adapter board like the one shown in the picture below. We attempted to find a reliable source for these boards but couldn't find one online, so check your local area for potential sellers.
GIZONT 433 Mhz 10 dbi Gain
The RA-02 LoRa module usually comes with an antenna, but it's often of very poor quality, providing a range of only 10-50 meters. We tested the GIZONT antenna (link provided), and it performed significantly better. While it’s possible we just got lucky with a well-calibrated antenna, feedback from Meshtastic users suggests that GIZONT is a reputable store.
When choosing an antenna, make sure to select the correct frequency. In our tests, we used a 40 cm antenna for base stations, like those placed at home or on a balcony, and a 24 cm or 20 cm antenna for handheld devices.
0.96 inch I2C OLED
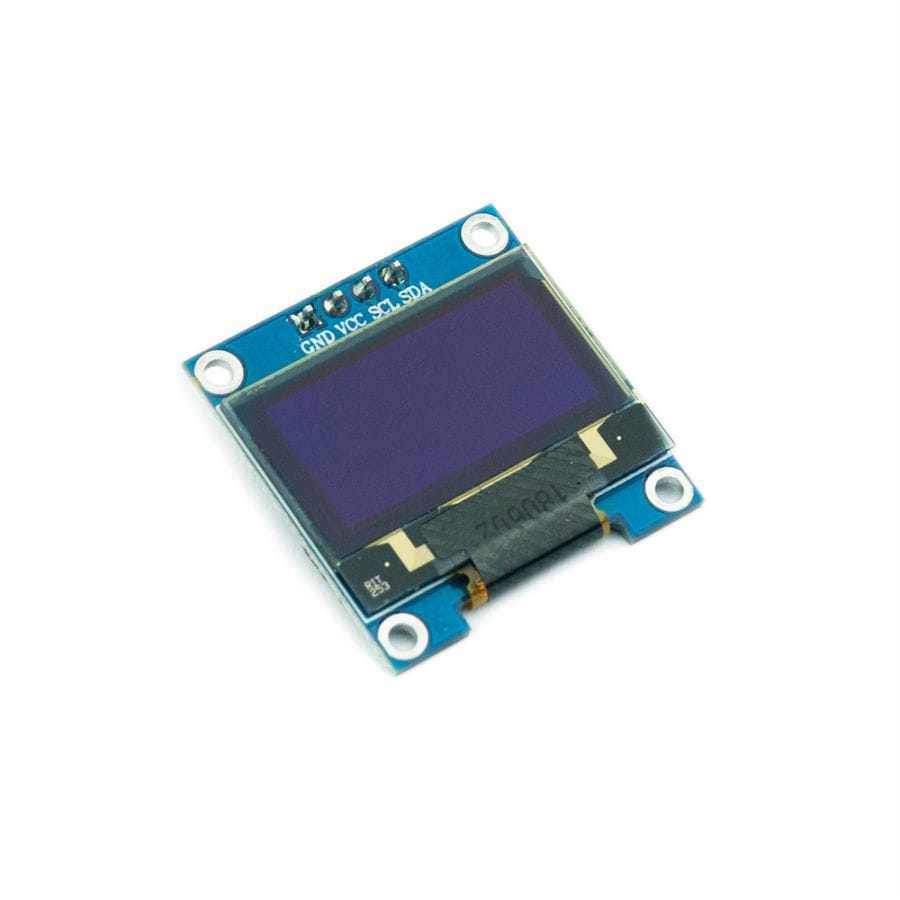
Finally, let's talk about the screen. While the node can function without a screen, having one is beneficial. The screen is particularly useful for pairing the node with your phone, although you can also pair it through a serial connection by finding the 6-digit number on the terminal. We strongly recommend getting a screen; they're reasonably priced and will significantly simplify your experience, making the whole process much smoother.
Assembly
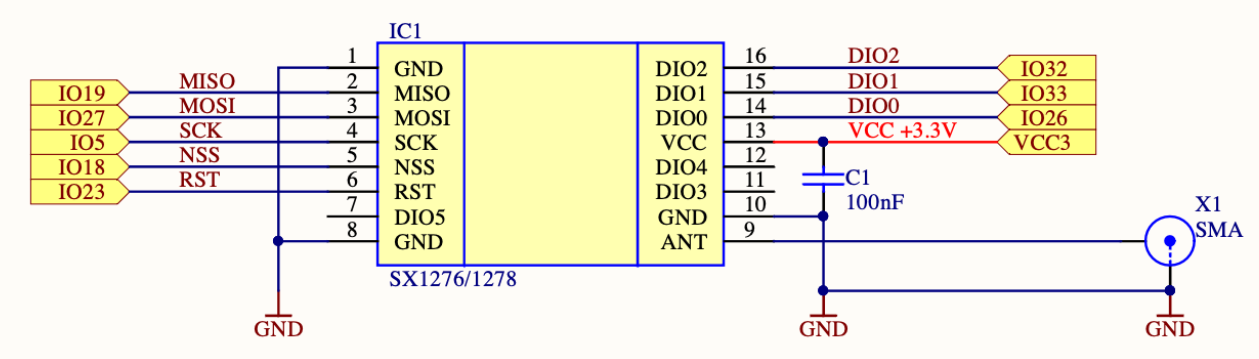
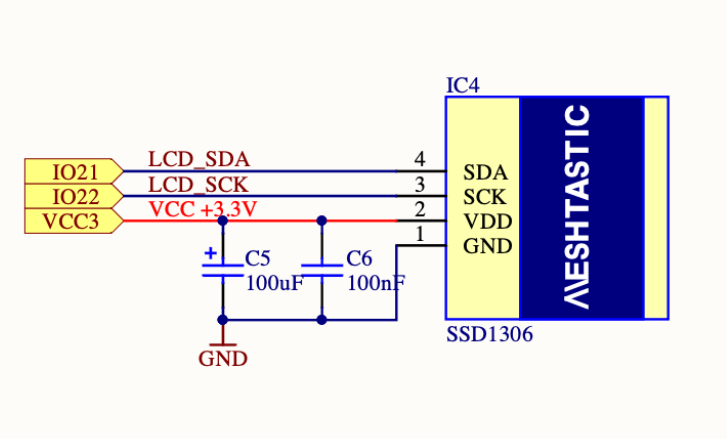
The hardware is all ready and set now to the wiring. For this, we will follow the following Schematics
433 MHZ LoRa Module Ra-02 DIP
0.96 inch I2C OLED
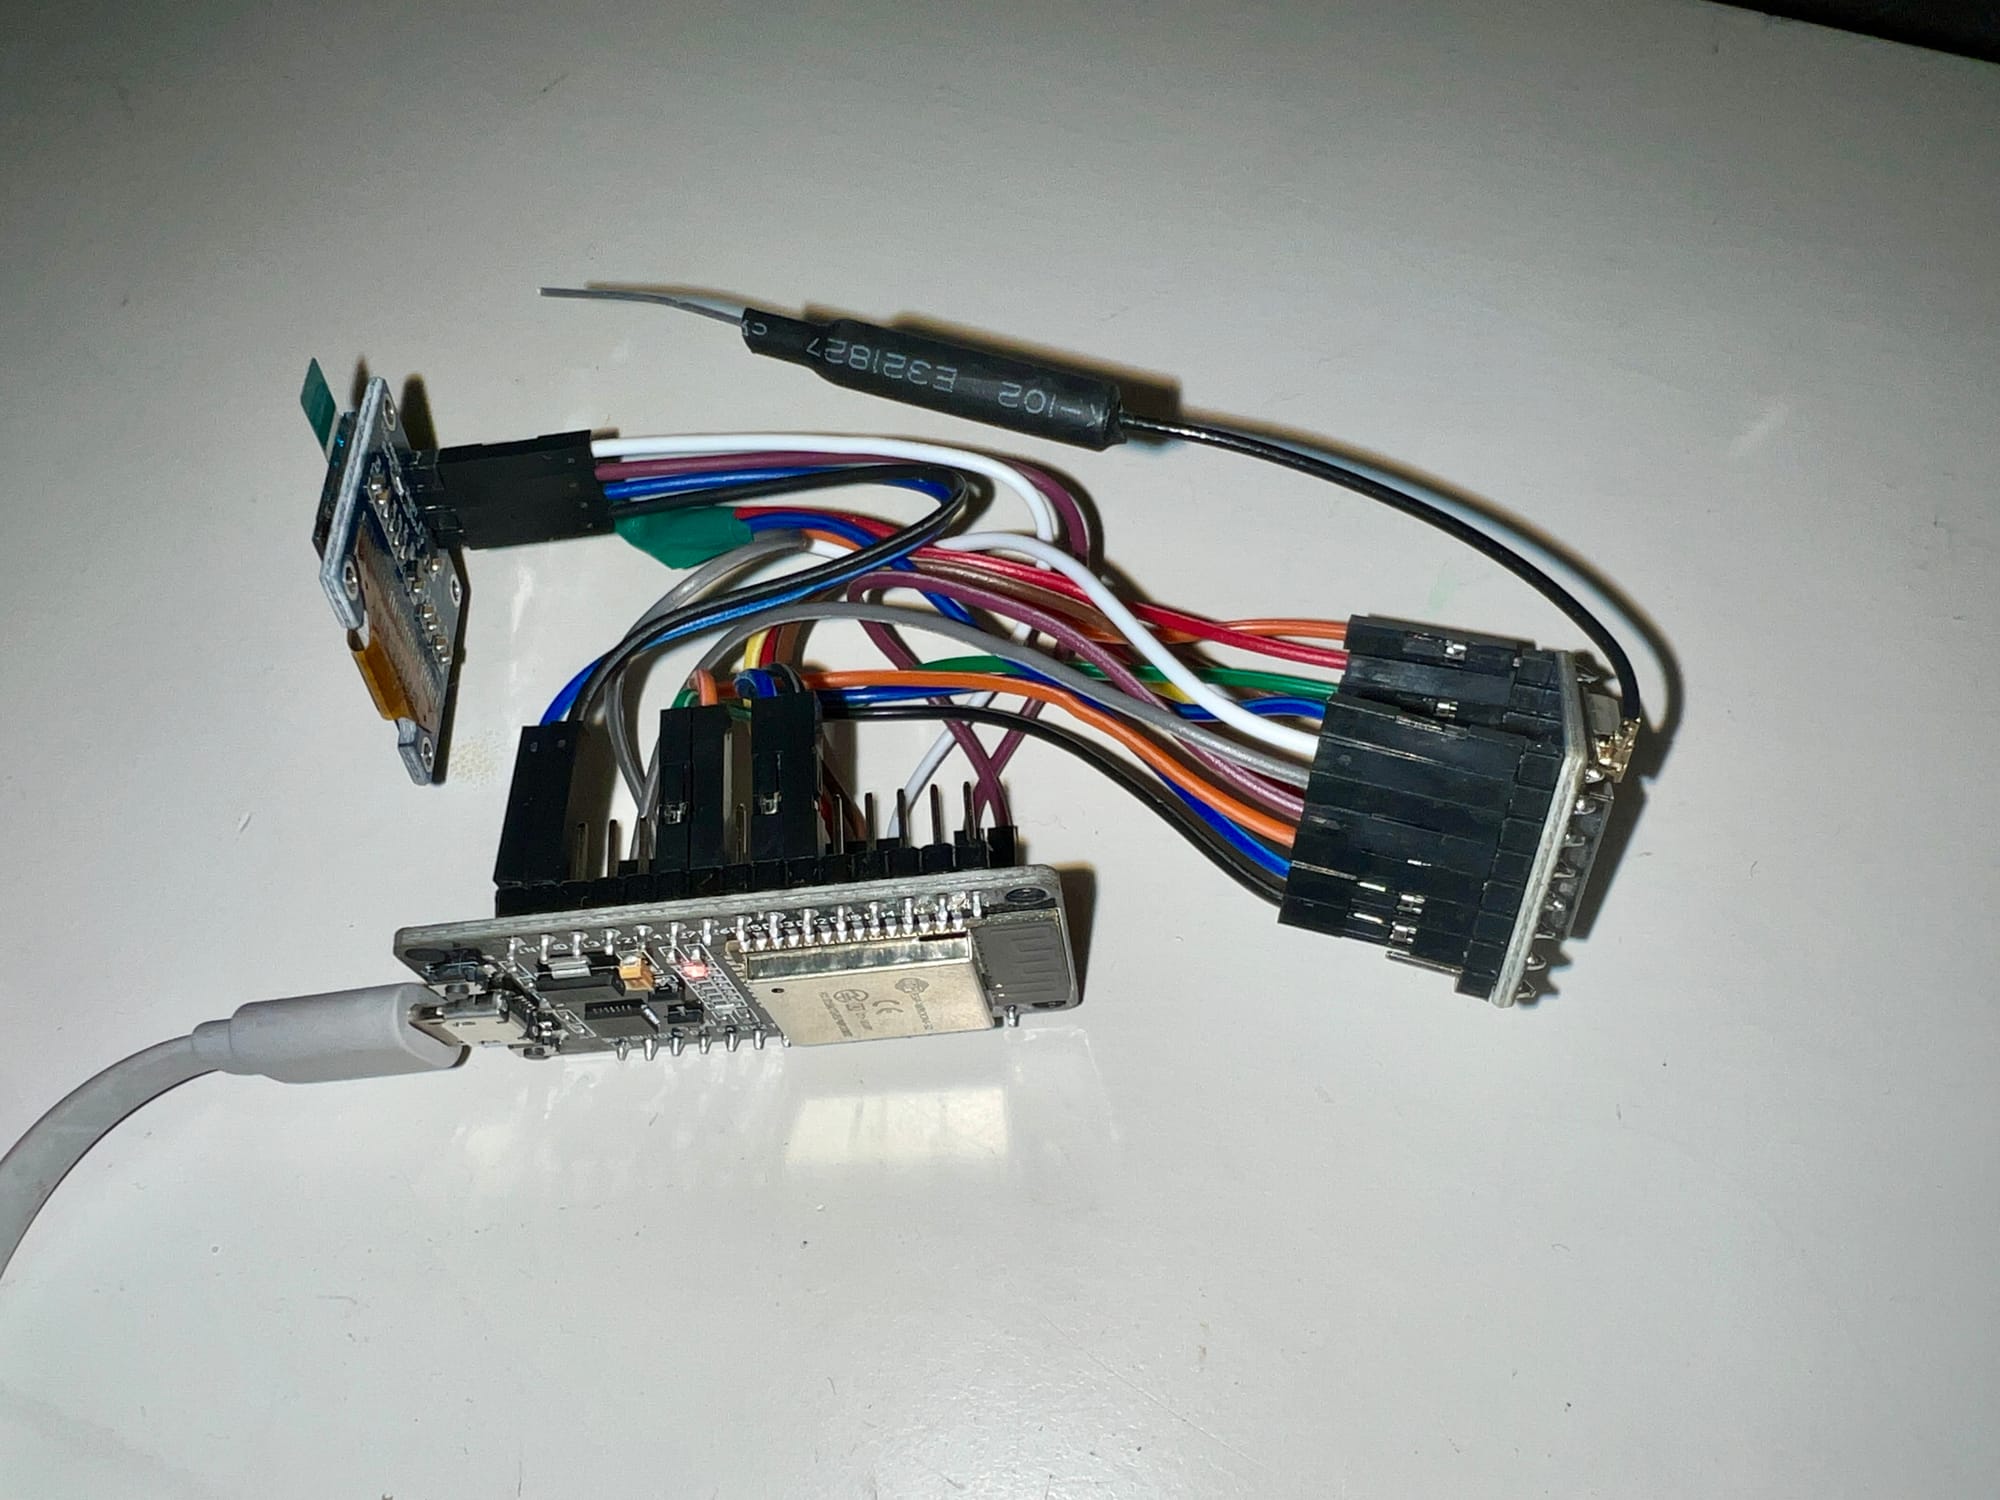
Once all the wiring is completed following the provided schematics, your setup should look like the picture below. Double-check your connections and ensure they match the suggested layout before proceeding to the next steps in the construction process.
 Adrelien
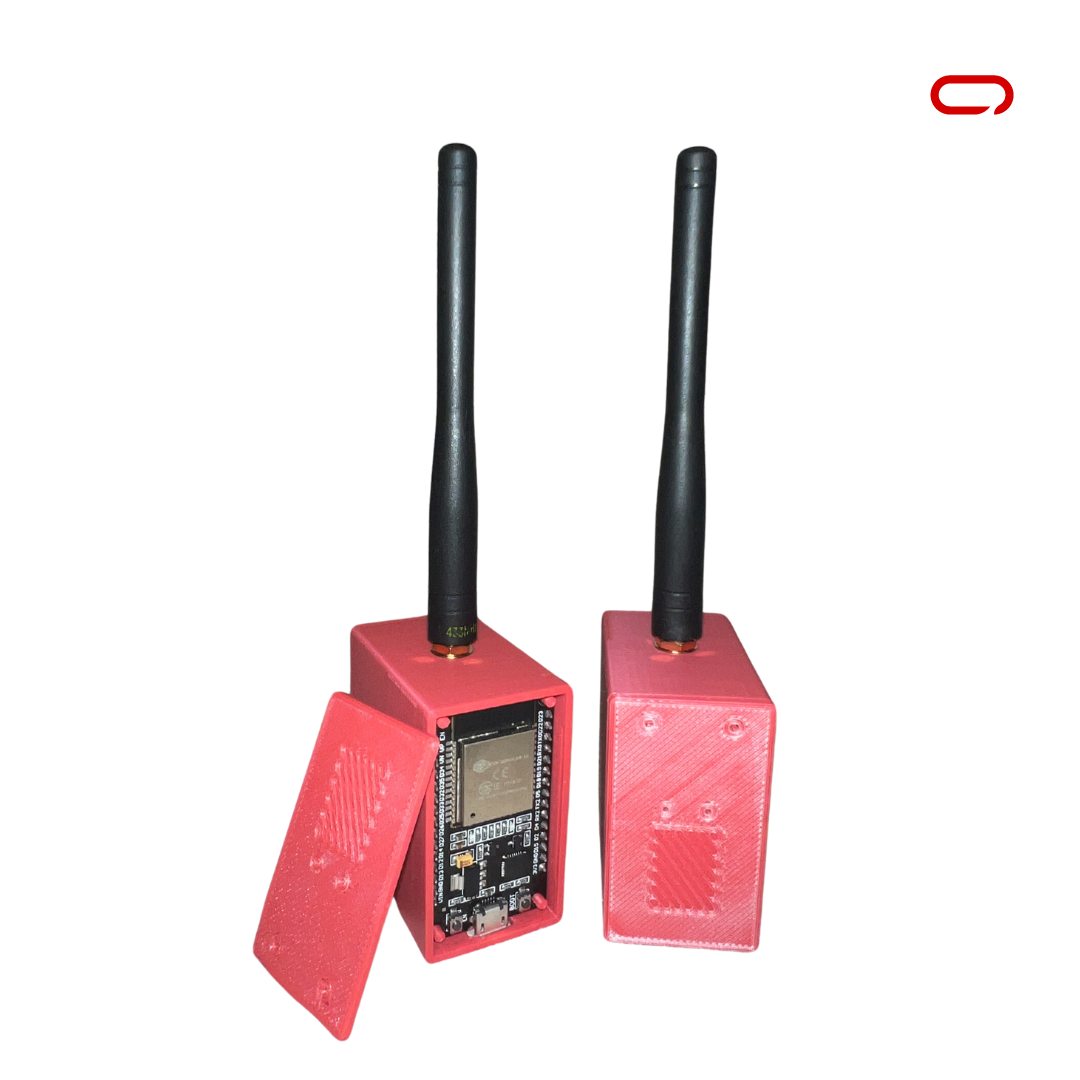
Flashing The Software
The Web-Based Installer requires either Chrome or Edge browsers but is an excellent choice for quickly flashing devices.
- Plug in your device
- Visit flasher.meshtastic.org *requires Chrome or Edge browser
- For device we will go with DIY V1
- Choose the latest stable version
- Click on Flash
The CLI Script is considered the "manual process" for flashing firmware. If the web-based flasher doesn't work, an alternative option is to use the CLI (Command Line Interface) script. While we won't cover it in detail in this guide, you can refer to the Meshtastic Guide for comprehensive instructions.
Pairing Devices
With the hardware assembled and the firmware flashed you're now ready to power up the Meshtastic LoRa Node and pair it with your phone. This step marks the exciting moment when your custom-built device begins its communication journey.
- Download the Meshtastic app on your phone. The app is available for download on both the App Store (iOS) and Google Play (Android).
- Head over to the Bluetooth page and wait a little bit, you should see a device popping up there.
- Choose the Meshtastic device you want to pair with from the list. The device's Node ID and other relevant information should be visible in the app.
- Meshtastic node will show the pairing code, enter that on your phone and wait for a second or two. You will be prompted to select your region. Go ahead and select EU433. The node will restart and you will be ready to go.
Conclusion
Building your own Meshtastic LoRa node can be a rewarding and cost-effective alternative to purchasing pre-made devices, especially if you have spare boards from previous projects or enjoy the satisfaction of DIY projects. The hardware requirements outlined, including the ESP-32S WiFi + Bluetooth Devkit V1, 433 MHZ LoRa Module Ra-02 DIP, and optional 0.96-inch I2C OLED screen, offer a versatile foundation for creating a mesh communication node.
The assembly process involves simple wiring, with a clear schematic provided for both the LoRa Ra-02 module and the optional screen. Soldering may be required, but local electronic shops can often assist with this step. It's emphasized that the screen, while optional, significantly enhances the user experience by simplifying the pairing process with the Meshtastic app on your phone.
Flashing the software is conveniently achieved through the web-based installer, compatible with Chrome or Edge browsers, or the CLI script for a manual process if needed. Careful attention during the flashing process is crucial to ensure successful firmware installation.
Finally, the pairing of devices with the Meshtastic app on your phone is straightforward. The app, available on both iOS and Android platforms, facilitates the identification and selection of the Meshtastic device, with a prompt to enter the pairing code displayed on the node. Following region selection and a brief restart, your DIY Meshtastic LoRa node is ready for use, providing a customizable and self-built solution for mesh communication.