ESP32 Soil Moisture Sensor: Real-Time Monitoring & Visualization
The ESP32 is a powerful microcontroller with built-in Wi-Fi, making it an excellent choice for IoT projects. In this guide, we will walk you through how to collect soil moisture data from a 2-prong soil sensor, send it to the cloud using Harbor Scale, and visualize it using a Grafana dashboard
The ESP32 is a powerful microcontroller with built-in Wi-Fi, making it an excellent choice for IoT projects. In this guide, we will walk you through how to collect soil moisture data from a 2-prong soil sensor, send it to the cloud using Harbor Scale, and visualize it using a Grafana dashboard. Let's dive in!
Hardware Requirements
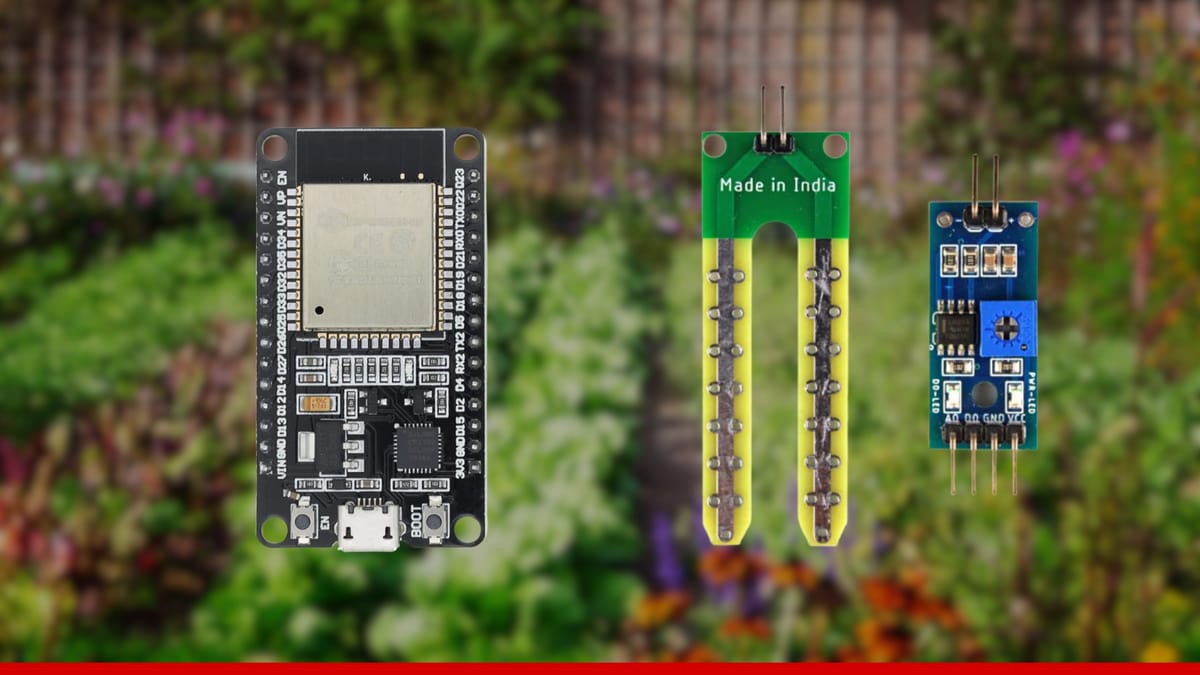
- ESP32 development board (NodeMCU ESP32, WROOM, etc.) - AliExpress Price 3.82USD| Amazon US Price 9.90USD
- 2-Prong Soil Sensor - AliExpress Price: 1.33USD | Amazon US Price 7.99USD
- Jumper wires - AliExpress Price: 0.42USD | Amazon US Price 5.49USD
- Micro USB Power & Data - AliExpress Price: 3.00USD | Amazon US Price ~5.00USD
- Optional: 3.3V power supply for standalone deployment
Software Requirements
- Arduino IDE (1.8.13 or newer)
- Required libraries:
- Harbor Scale SDK
- WiFi Library (built into ESP32 core)
- HTTPClient Library (built into ESP32 core)
- Harbor Scale account (free tier available)
Step 1: Setting Up Your Development Environment
Installing ESP32 Board Support
- Open Arduino IDE
- Go to File > Preferences
- Add the following URL to the "Additional Boards Manager URLs":
https://raw.githubusercontent.com/espressif/arduino-esp32/gh-pages/package_esp32_index.json- Go to Tools > Board > Boards Manager
- Search for "ESP32" and install the ESP32 by Espressif Systems
Installing Required Libraries
- Go to Sketch > Include Library > Manage Libraries
- Search for and install:
- Harbor Scale SDK
Step 2: Wiring the 2-Prong Soil Sensor to ESP32
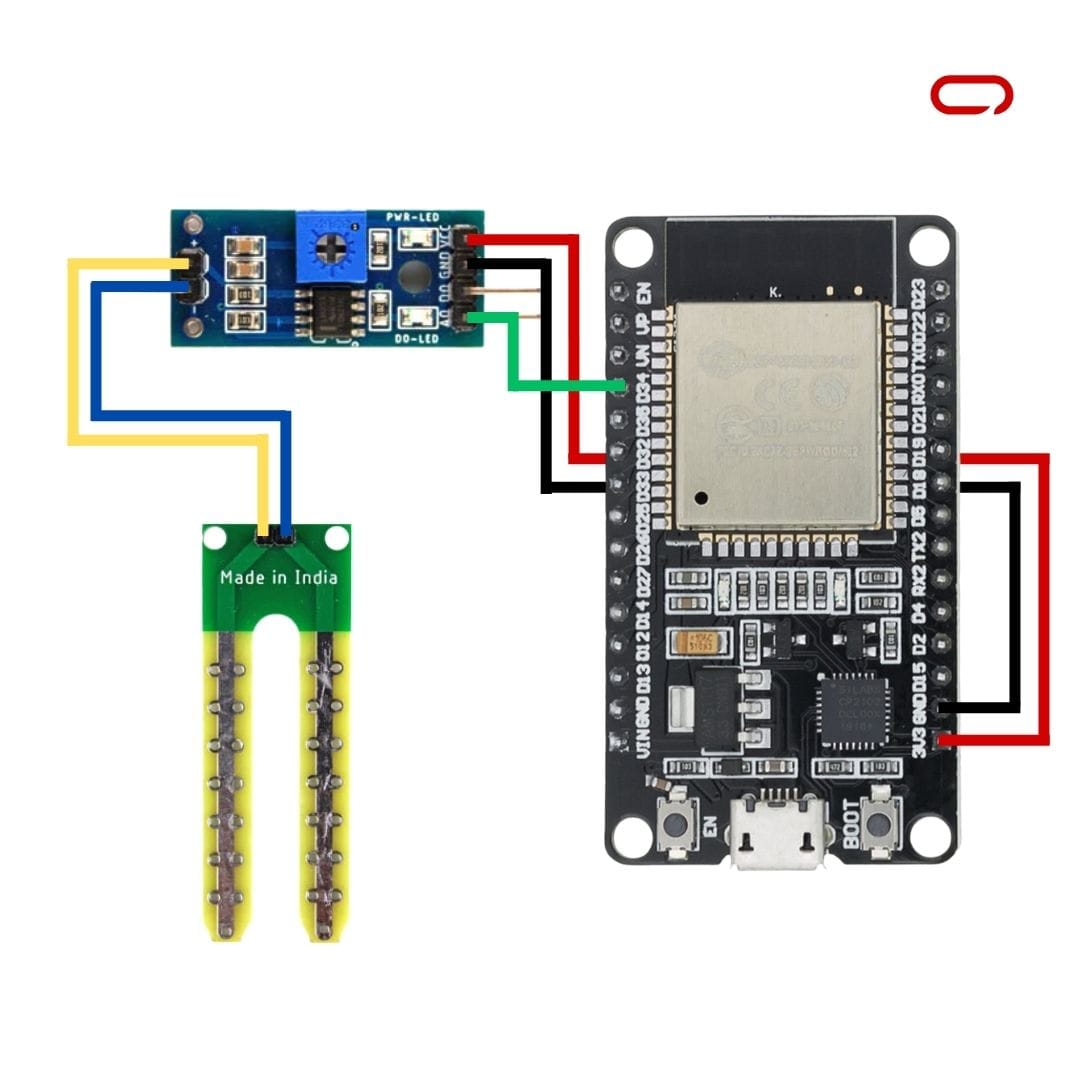
The 2-prong soil sensor uses analog output, which requires just three connections:
| Soil Sensor PIN | ESP32 PIN | FUNCTION |
|---|---|---|
| VCC | 3.3V | Power |
| GND | GND | Ground |
| A0 Analog | GPIO 34 | Analog Data |
Step 3: Setting Up Harbor Scale
Harbor Scale provides a straightforward platform for collecting, storing, and visualizing IoT sensor data. Follow these steps to set up your account:
Create an Account:
Visit Harbor Scale and sign up for a new account.
Create a New Harbor:
- From your dashboard, click Create New Harbor
- Name it something descriptive like "ESP32_Soil_Monitor"
- Select the harbor type as General and Specification Free
Generate an API Key:
- Navigate to "View Details" for your created harbor
- Click "View API Key"
- Copy and save your API Key securely - you'll need it for your ESP32 code
- Note your API ENDPOINT from the API Endpoint
Step 4: Uploading and Testing the Code
The complete code for this project is available in our GitHub repository. You can view and download it directly:
Getting the Code:
- Visit the Repository: Click the GitHub link above
- Find the Main Code File: Look for
ESP32_Soil_Sensor_Telemetry_Harbor.inoin the repository - Download Options:
- Option A: Click the file name, then click "Raw" to view the code directly, then copy-paste into Arduino IDE
- Option B: Click the green "Code" button and "Download ZIP" to get all project files
- Option C: Use the direct link: ESP32_Soil_Sensor_Telemetry_Harbor.ino
Configure the Code:
// WiFi credentials
const char* ssid = "YOUR_WIFI_NAME";
const char* password = "YOUR_WIFI_PASSWORD";

// Harbor Scale API info
const char* harborEndpoint = "YOUR_API_ENDPOINT";
const char* harborApiKey = "YOUR_API_KEY";
const char* shipId = "Garden 1";

// Sleep interval (5 minutes default)
const int SLEEP_INTERVAL_SEC = 5 * 60;- Replace the WiFi SSID and password with your network credentials
- Update the Harbor Scale API URL and API key with your account details
- Adjust the sensor reading interval if needed (default is 5 minutes)
- Customize the
shipIdto identify your monitoring location
Select the Correct Board:
- Go to Tools > Board and select your ESP32 board model
- Select the correct COM port under Tools > Port
Upload the Code:
- Click the Upload button (→) in Arduino IDE
- Wait for the compilation and upload to complete
Verify Operation:
- Open the Serial Monitor (Tools > Serial Monitor) set to 115200 baud
- Check for successful WiFi connection and sensor initialization
- Monitor soil moisture readings and verify data transmission
- Confirm data is being sent to Harbor Scale
Step 5: Visualizing Data with Harbor Scale
Once your ESP32 begins transmitting soil moisture data, you can create powerful visualizations in Harbor Scale through its integrated Grafana dashboards:
Access Grafana Credentials:
- Go back to the Harbor Details page
- Copy the Grafana Password shown on this page
- Click on the Grafana Endpoint link provided
Login to Grafana:
- Use your Grafana Username (this will be the same as your Harbor Scale email)
- Enter the Grafana Password you copied earlier
Navigate to Dashboards:
- In the left sidebar, click on Dashboards
- Select the Comprehensive Telemetry Dashboard (this is the demo dashboard provided by Harbor Scale)
Configure Your Dashboard View:
- Choose your data source (which will be your harbor)
- Use the filters to view data based on ship_id and cargo_id
- Select appropriate time ranges to view your soil moisture history
- Set up alerts for moisture thresholds (e.g., below 30% = watering needed)
Harbor AI: Your Smart Garden Assistant
One of the most exciting features of Harbor Scale is Harbor AI - an intelligent assistant that can analyze your garden data and provide insights in natural language. Harbor AI combines general agricultural knowledge with your specific sensor data to give you personalized gardening advice.
Example Conversation with Harbor AI:
You: "How is my Garden 1 doing?"
Harbor AI: "Let me review the latest key environmental metrics that influence plant health: soil moisture, temperature, humidity, and solar radiation.
Here's an update on your Garden 1 based on the latest data:
- Soil Moisture: Steady at around 70%, which is a healthy moisture level for most plants.
- Temperature, Humidity, Solar Radiation: There are no recent readings available for these metrics in the latest data.
Overall, your garden's soil moisture looks good, indicating well-watered soil."
Harbor AI Can Help You:
- Assess plant health based on multiple sensor readings and horticultural knowledge
- Identify optimal conditions for your specific plants using correlation analysis
- Detect problems early through anomaly detection before they become serious
- Plan ahead with trend analysis and forecasting
- Make data-driven decisions with aggregated insights from all your sensors
This AI-powered analysis transforms raw sensor data into actionable gardening insights, making it easy for anyone to understand their garden's needs without being a data expert or plant specialist.
Conclusion
Your ESP32 is now up and running with the 2-prong soil sensor, streaming live soil moisture data to Harbor Scale. With this setup, you can monitor your garden's hydration needs in real time and make data-driven watering decisions.
Want to take it further? Try adding multiple sensors for different garden zones, setting up automated irrigation alerts, or even integrating weather data for smarter watering schedules. The ultra-low power design means your sensors can run for months on a single battery, making this perfect for remote garden monitoring. The possibilities are endless!