How To Add an Earthquake Sensor To Your Meshtastic Device
Integrate a vibration/earthquake sensor into your ESP32-based LoRa Meshtastic Node with our guide, suitable for boards like Heltec V3 Lora, TTGo, or T-Beam. This setup allows the network to broadcast warnings when seismic activity is detected.

In this guide, we'll walk you through adding an earthquake/vibration sensor to your existing ESP32-based LoRa Meshtastic Node. This guide works for any ESP32-based board like Heltec V3 Lora, TTGo, or T-Beam with minor adjustments.
Hardware
Let's start with the components you'll need:
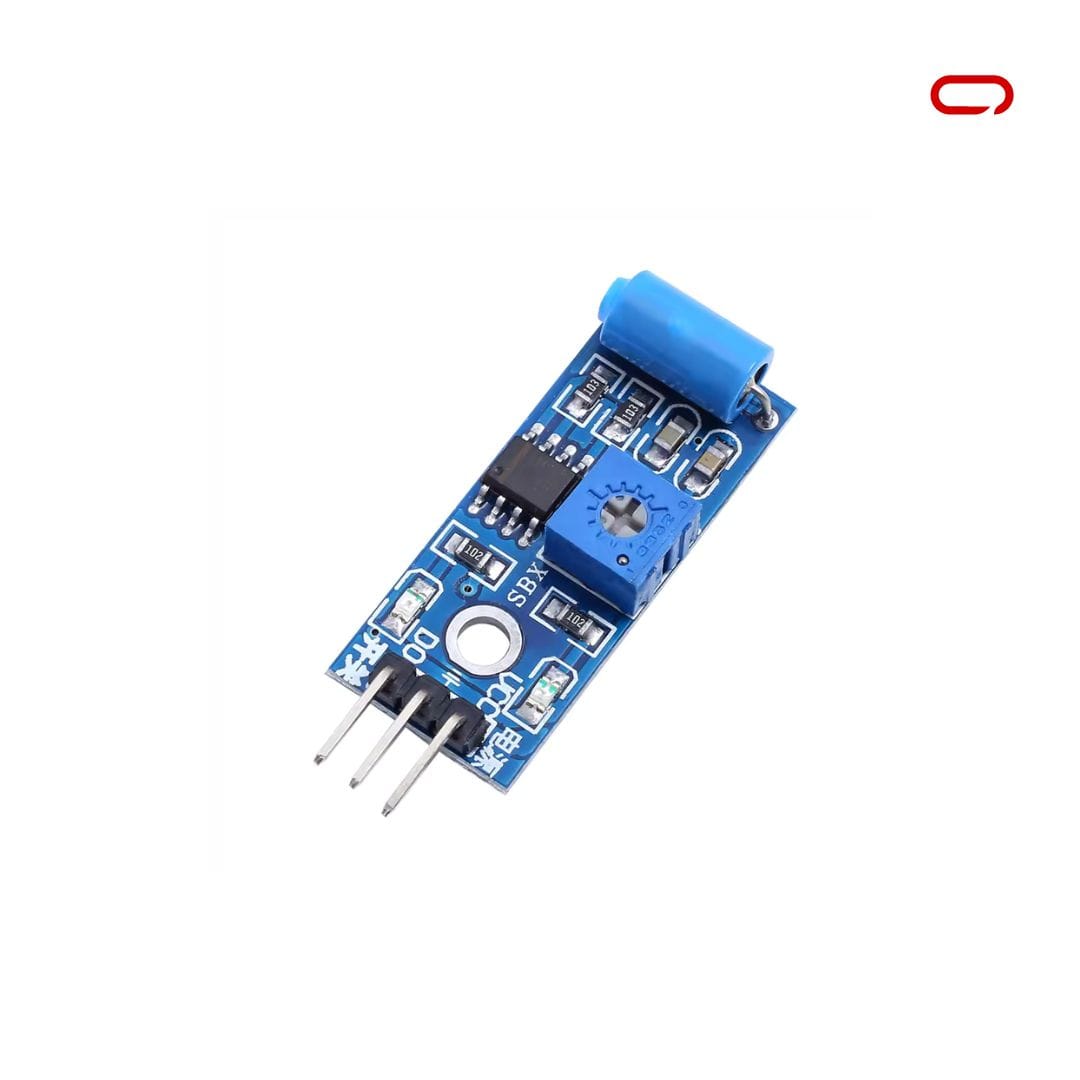
- 1x SW-420 Vibration Sensor Module - AliExpress Price: ~$0.70 USD | Amazon US Price: ~$5.99 USD for a pack of 5
- 3x Female to Female Pin Connector AliExpress Price: 0.42USD | Amazon US Price 5.49USD
Assembly
Now that you have your components, let's proceed with the wiring. We'll follow these schematics:
SW-420 Vibration Sensor - Heltec Lora v3 Connections
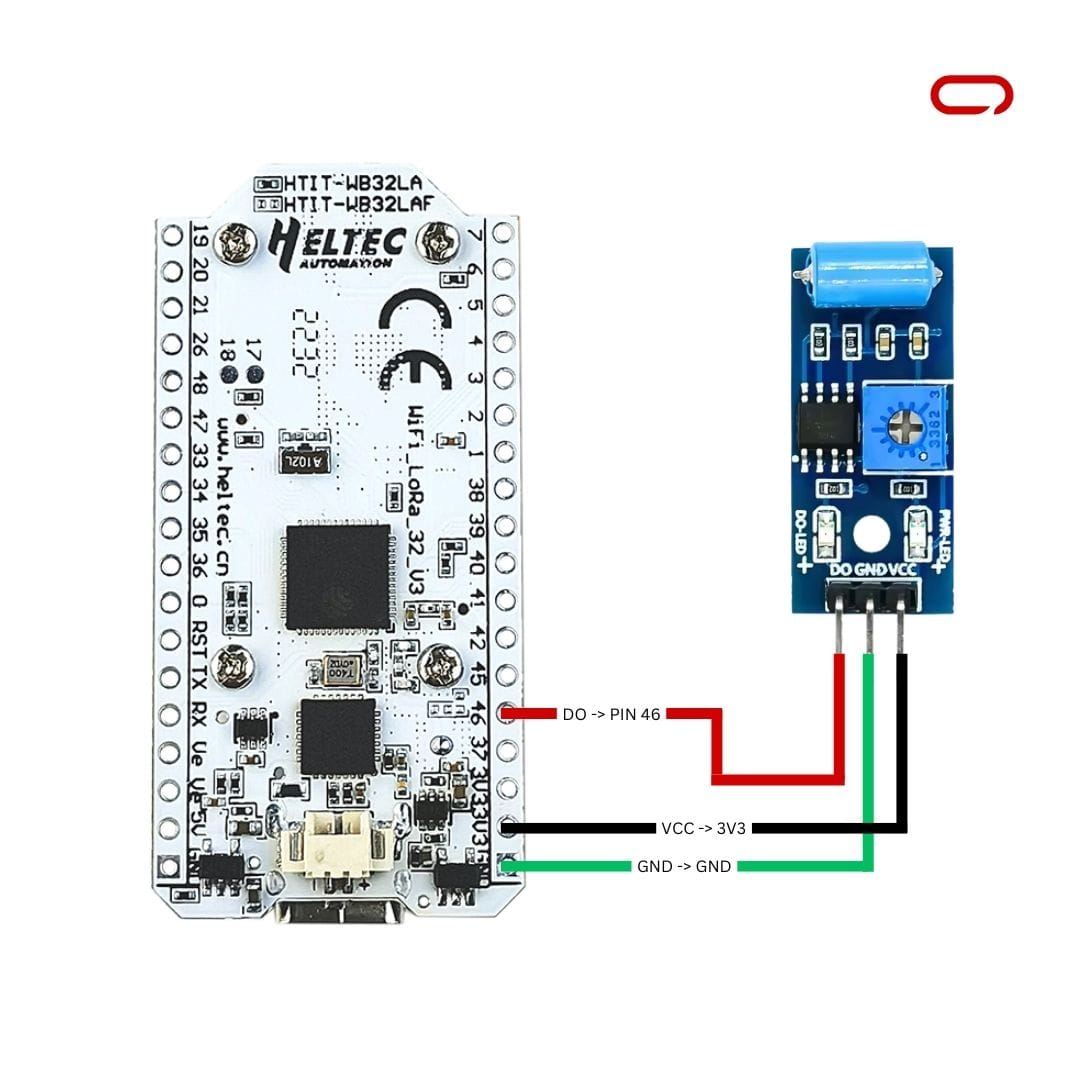
- VCC → 3V3
- DO (Digital Output) → PIN 46 (or any available GPIO pin of your choice)
- GND → GND
Once all wiring is completed, double-check your connections and ensure they match the suggested layout before proceeding to the next steps.
Meshtastic Settings
On the Sensor Device
- Open Meshtastic App (iOS/Android/Web)
- Go to the Settings page
- In the module configuration section, go to Detection Sensor
- Toggle the switch to enable it
- Give the sensor a name (e.g., "Earthquake Sensor")
- Set GPIO PIN to monitor to PIN 46 (or whichever pin you used)
- Press Save
On the Client Device
- Open Meshtastic App (iOS/Android/Web)
- Go to the Settings page
- In the module configuration section, go to Detection Sensor
- Toggle the switch to enable it
- Right under the toggle, select "Client" this time
- Press Save
Testing and Calibration
The SW-420 vibration sensor has an adjustable sensitivity via the potentiometer on the module:
- Start with the potentiometer in the middle position
- Use a small screwdriver to adjust sensitivity:
- Clockwise: Decreases sensitivity (requires stronger vibration to trigger)
- Counterclockwise: Increases sensitivity (triggers with lighter vibration)
Finding the right balance is crucial:
- Too sensitive: May cause false alarms from wind or footsteps
- Not sensitive enough: Might miss actual seismic events
Conclusion
This guide has walked you through integrating an earthquake/vibration sensor with your ESP32-based Meshtastic Node. The SW-420 provides basic detection capabilities perfect for DIY early warning systems within your mesh network.
Remember that if your sensor is expected to be triggered frequently (such as in areas with regular minor tremors), consider setting detection limits in the Meshtastic settings to avoid saturating the network. Check out our Channel Utilization post for more information on optimizing network traffic.
Explore the potential of your Meshtastic Node by experimenting with different sensitivity settings and placements to create an effective early warning system for your mesh network. Happy building!