How To Add Telemetry (Temperature etc) Sensor To FakeTec Meshtastic Device With BME280
We'll walk you through adding a Telemetry module to your FakeTec Meshtastic Device to measure air pressure, temperature, and humidity.
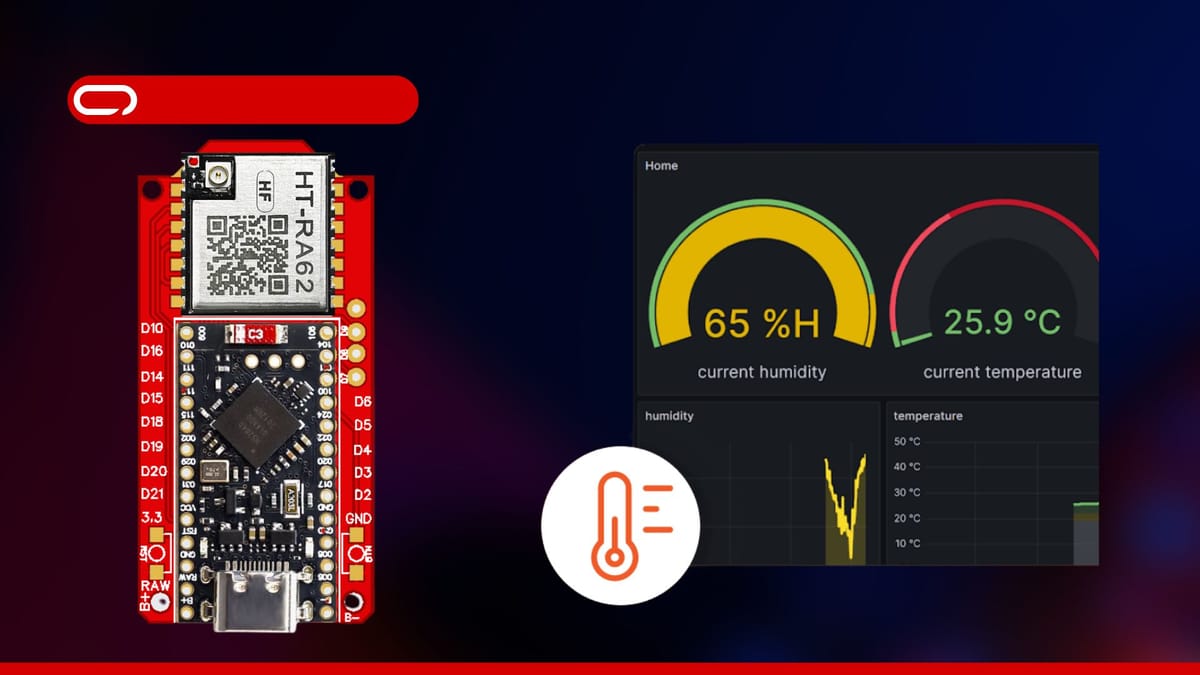
In this guide, we'll walk you through adding a telemetry sensor (BME280) module to your existing FakeTec Meshtastic Node to measure air pressure, temperature, and humidity.
Hardware
Now let's get started with the hardware you need:
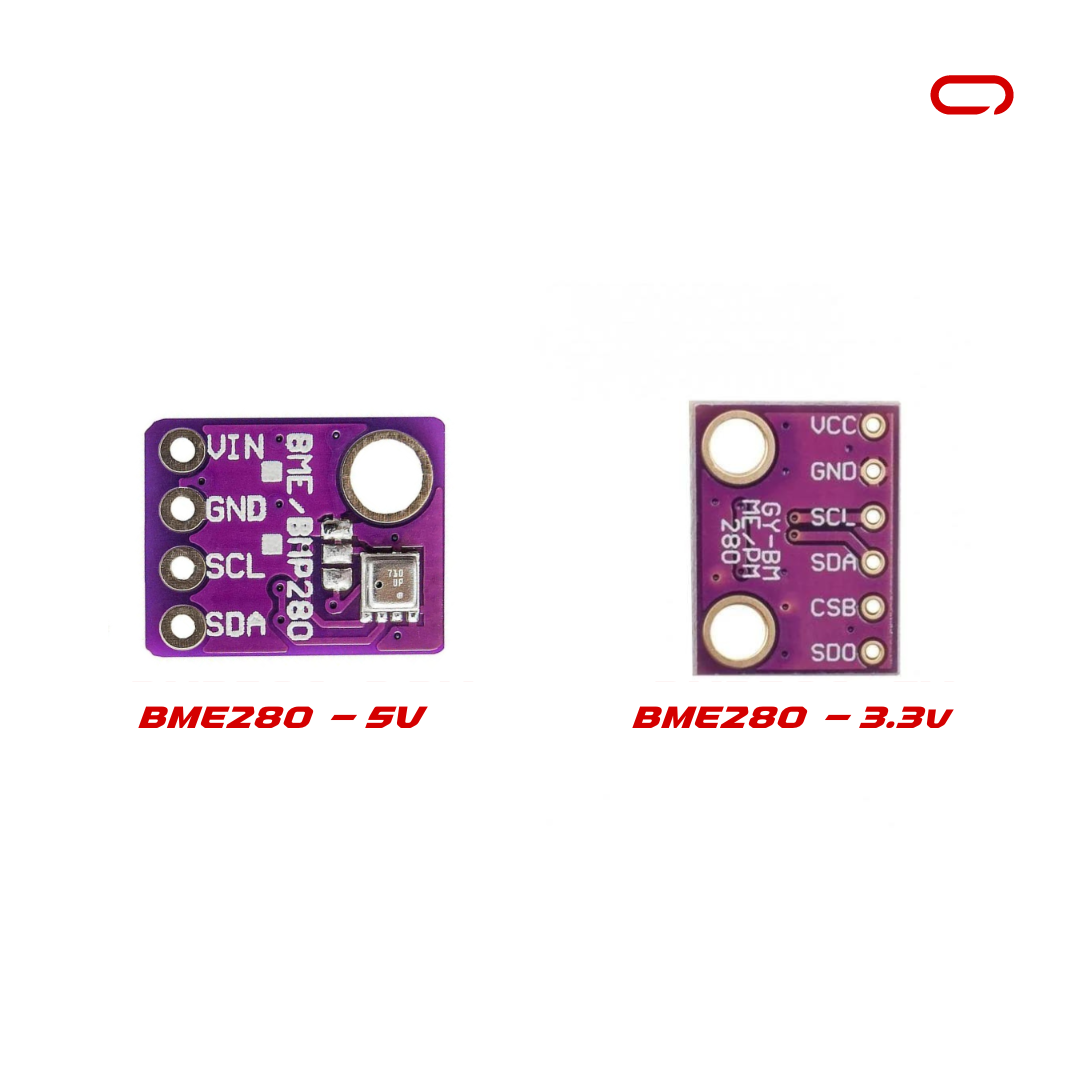
- 1x BME280 Module - AliExpress Price: 4.20USD | Amazon US Price 8.99USD
- 4x Female to Female Pin Connector AliExpress Price: 0.42USD | Amazon US Price 5.49USD
- 1x Soldering Iron + 60/40 Solder Wire (Optional - You can go to a nearby electronic shop to solder the headers on the board)
While you can modify this hardware selection, we've chosen readily available components. Note that soldering is only required to attach headers to the FakeTec Node and the BME280 module. This step can be outsourced to a local electronics shop if you prefer to avoid soldering yourself.
Assembly
The hardware is all ready and set now to the wiring. For this, we will follow the following Schematics.
BME280 Telemetry Module → FakeTec Meshtastic Node
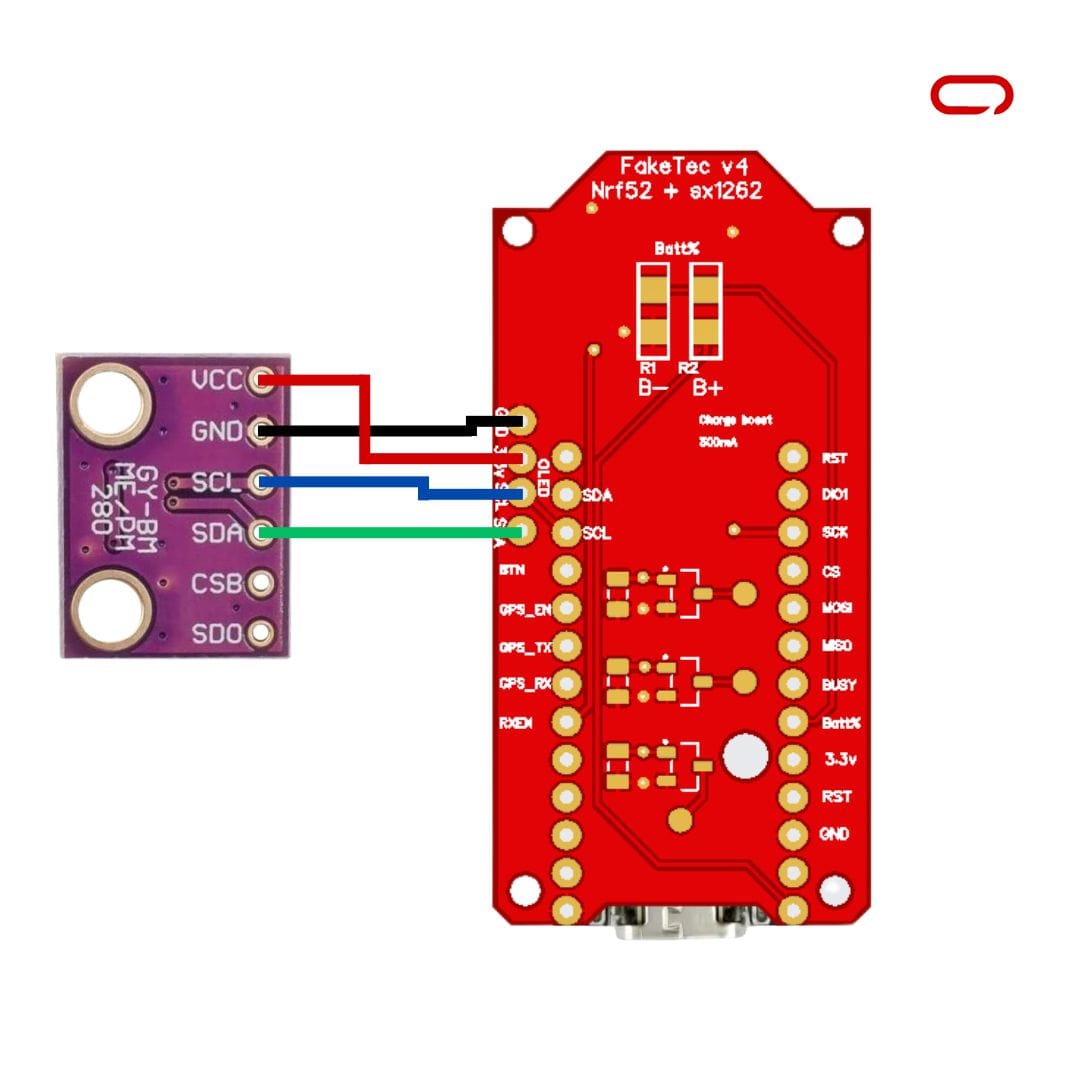
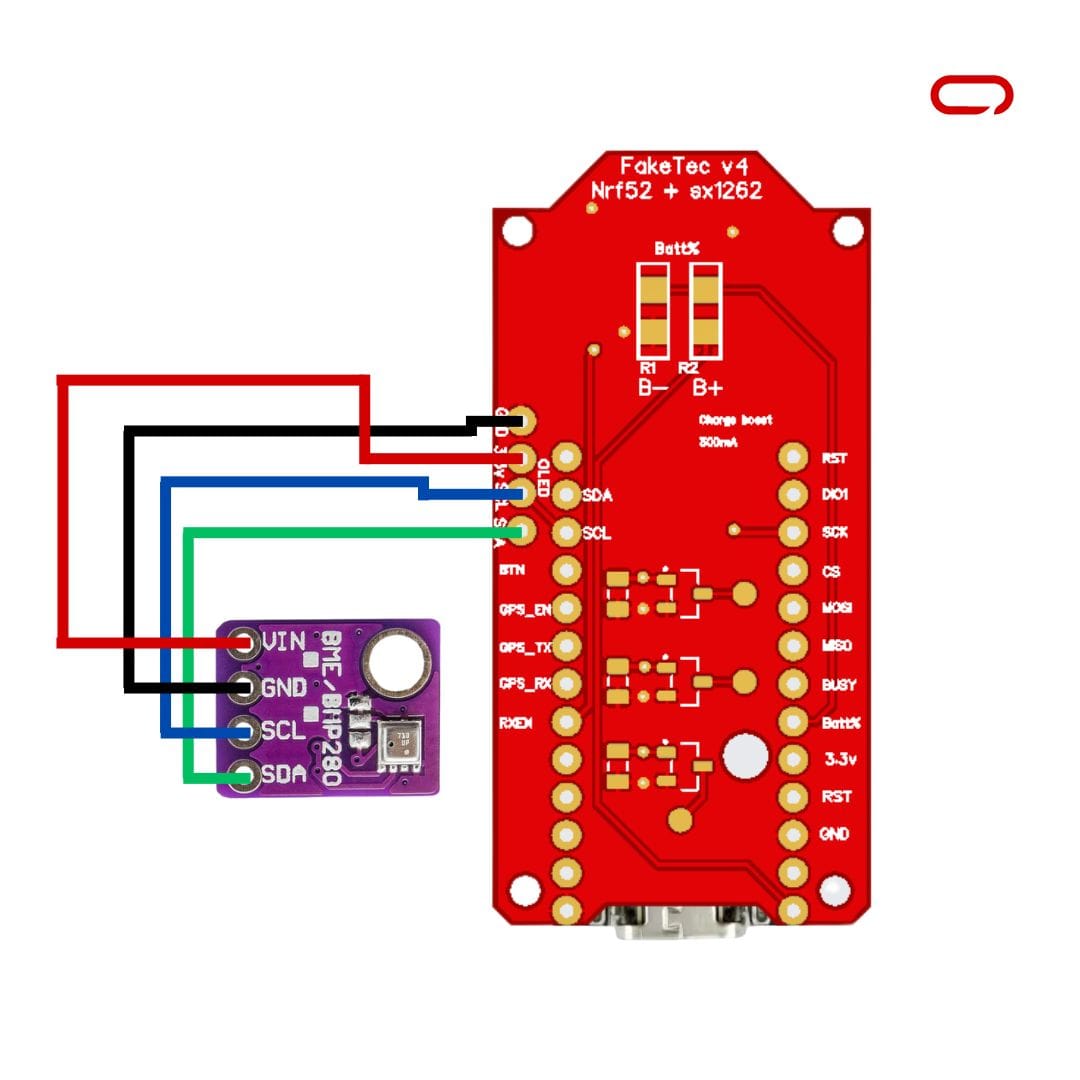
- VCC/VIN → 5V For BME280-5V OR 3.3V For BMP280-3.3V
- SCL → SCL Pin
- SDA → SDA Pin
- GND → GND Pin
After completing all connections, verify that they match the recommended configuration before proceeding to the next stage.
Meshtastic Settings
- Open Meshtastic App (IOS for this guide)
- Go to the Settings page
- In the module configuration section go to Telemetry (Sensor)
- Scroll down to the Sensor Options
- Toggle the switch Enable and other switches according to your preference
Conclusion
Adding a Telemetry module to your FakeTec Meshtastic Node is a straightforward process that significantly enhances your device's capabilities. The BME280 module provides reliable environmental monitoring at an affordable price. While some soldering may be required, this can be easily delegated to a local electronics shop if needed. By following this guide, you can successfully integrate environmental sensing functionality into your Meshtastic network, enabling the collection and sharing of temperature, humidity, and air pressure data.