How to Track Planes Above Your House for $20
Turn a $20 USB stick into a real-time flight tracker! ✈️ Decode ADS-B signals to see speed, altitude, and flight paths of planes above your house. Build your own private FlightRadar24 today with this simple guide. 📡
Got a $20 burning a hole in your pocket this Christmas? Turn it into your own flight tracker. One cheap USB dongle receives aircraft broadcasts and displays them on a live map, no subscriptions, no cloud services, just planes overhead with their flight numbers, altitudes, and speeds showing in real-time.
Hardware Requirements
RTL-SDR USB dongle with R820T2/RTL2832U chipset. The blue one from AliExpress works perfectly:
- RTL-SDR R820T2 - AliExpress Price 19,00USD| Amazon US Price 39.95USD
The Software (All Free):
- Zadig (USB driver installer)
- dump1090 (decodes ADS-B signals from planes)
- Virtual Radar Server (displays planes on map)
What ADS-B Actually Is
Commercial aircraft broadcast their GPS position, altitude, speed, and identification on 1090 MHz. It's called ADS-B (Automatic Dependent Surveillance-Broadcast). Your $20 dongle picks up these transmissions. Software decodes them. You see planes on a map. No special permissions needed, these are public broadcasts.
Windows Setup
Step 1: Install USB Driver
Windows doesn't recognize the RTL-SDR without a generic USB driver.
- Go to zadig.akeo.ie and download it, run the .exe file.
- Plug in your RTL-SDR dongle and wait for Windows to finish detecting it (even if it fails).
- Right-click zadig.exe → "Run as administrator"
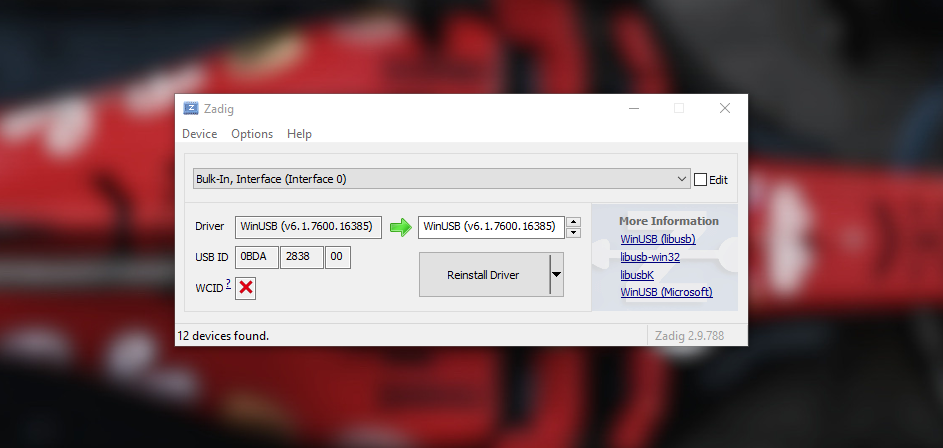
- Click
Options→ CheckList All Devices - In dropdown, select
Bulk-In, Interface (Interface 0) - Critical: Must say Interface 0 (not Interface 1)
- Right-side box should show
WinUSB - Click
Install DriverorReplace Driver - Wait for
The driver was installed successfully.
Step 2: Download & Run dump1090
- Get the Windows build:
github.com/gvanem/Dump1090/archive/refs/heads/main.zip - Extract the ZIP: Unzip to a simple location like
C:\dump1090\ - Open the dump1090 folder Navigate to where you extracted it (like
C:\dump1090\) - In the folder address bar, type
cmdand press Enter. Command Prompt opens in that location. - Start dump1090:
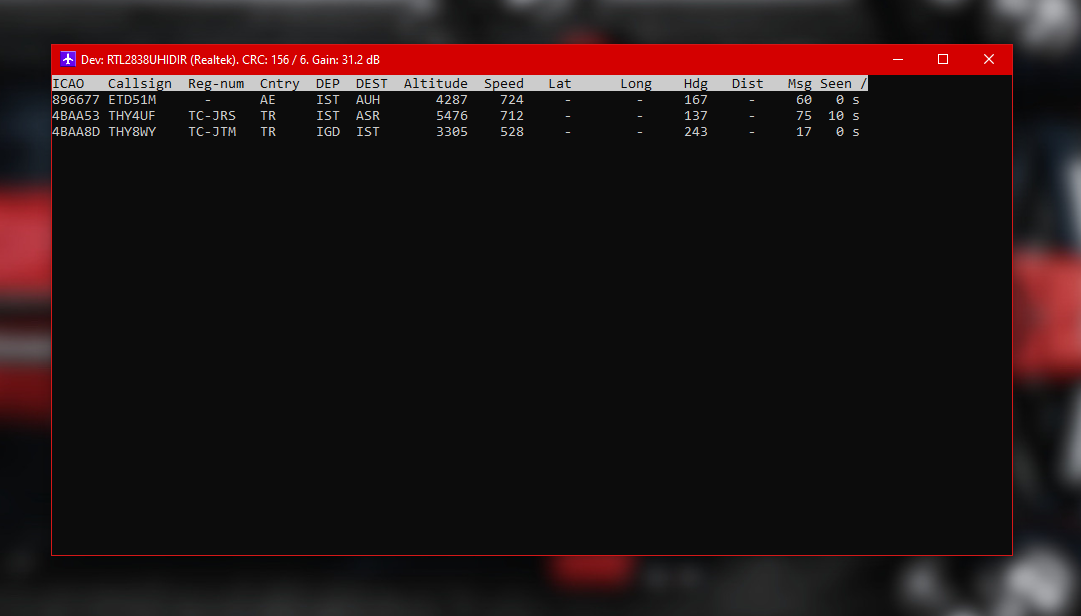
dump1090.exe --interactive --net
You'll see text showing aircraft detections. Each line is a decoded ADS-B message. Leave this window open.
Step 4: Install Virtual Radar Server
- Download VRS: Go to virtualradarserver.co.uk and download the installer.
- Run the installer: Click through the setup. Default options work fine.
- After installation, open VRS.
Step 5: Configure VRS to Read dump1090
Open Virtual Radar Server: then from the top menu click Tools → Options
- Click
Receiversin the left sidebar. - Click
Wizardto start the receiver setup wizard. - When asked
what type of receiver you want to connect, chooseSoftware Defined Radio (SDR). - When asked
which decoder program you are using with the SDR, selectdump1090. - When asked
Is the decoder running on this computer?, selectYes. - Finish the wizard.
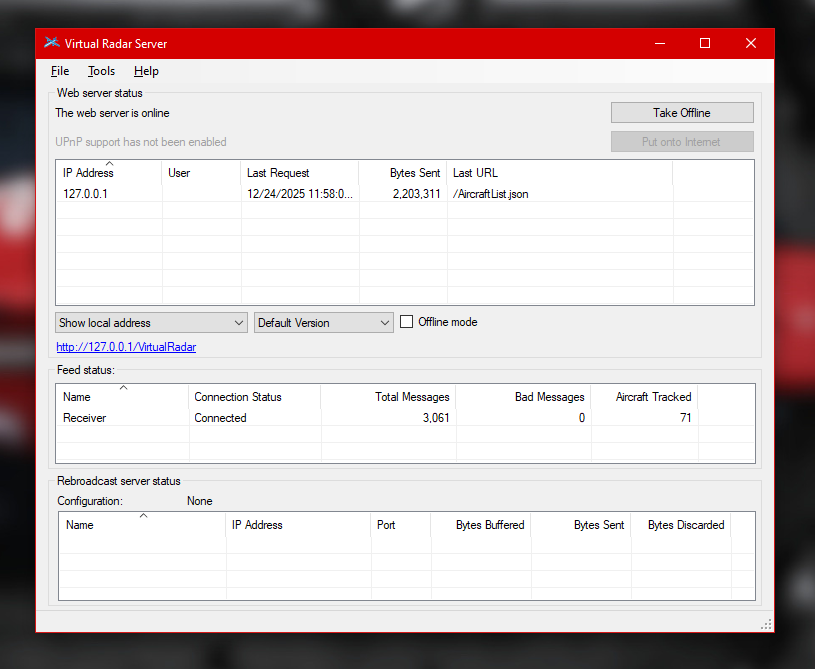
After the wizard completes, click Test Connection. It should say: A connection can be made with these settings.
dump1090Step 6: See Planes
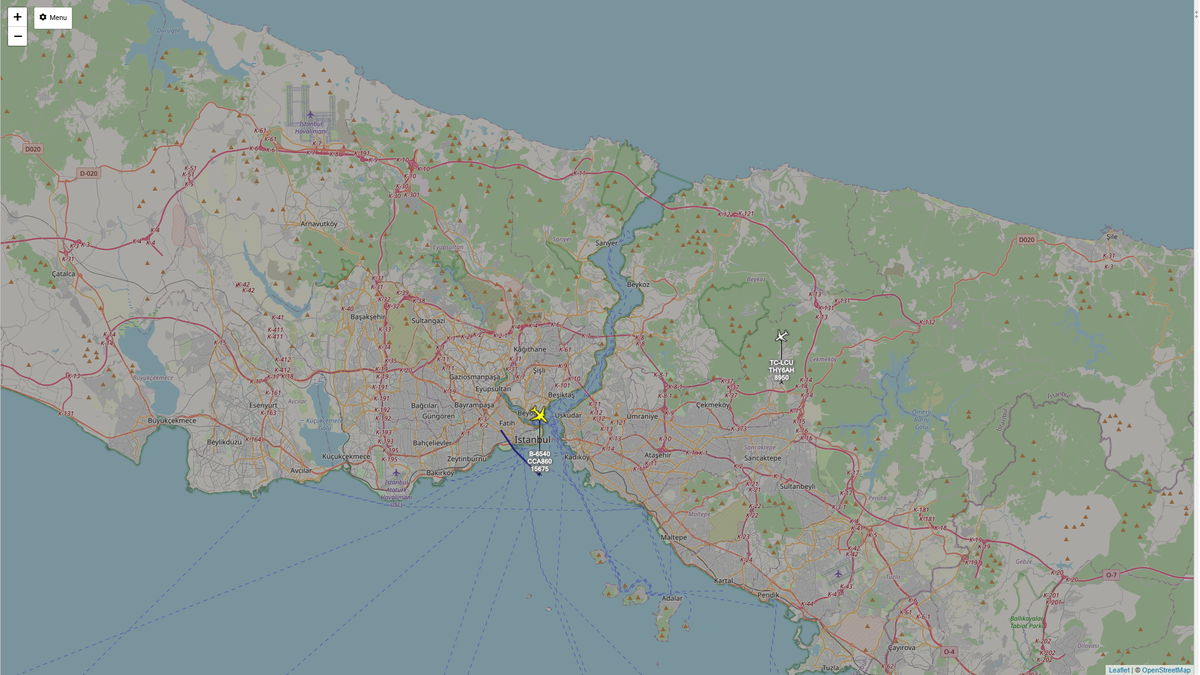
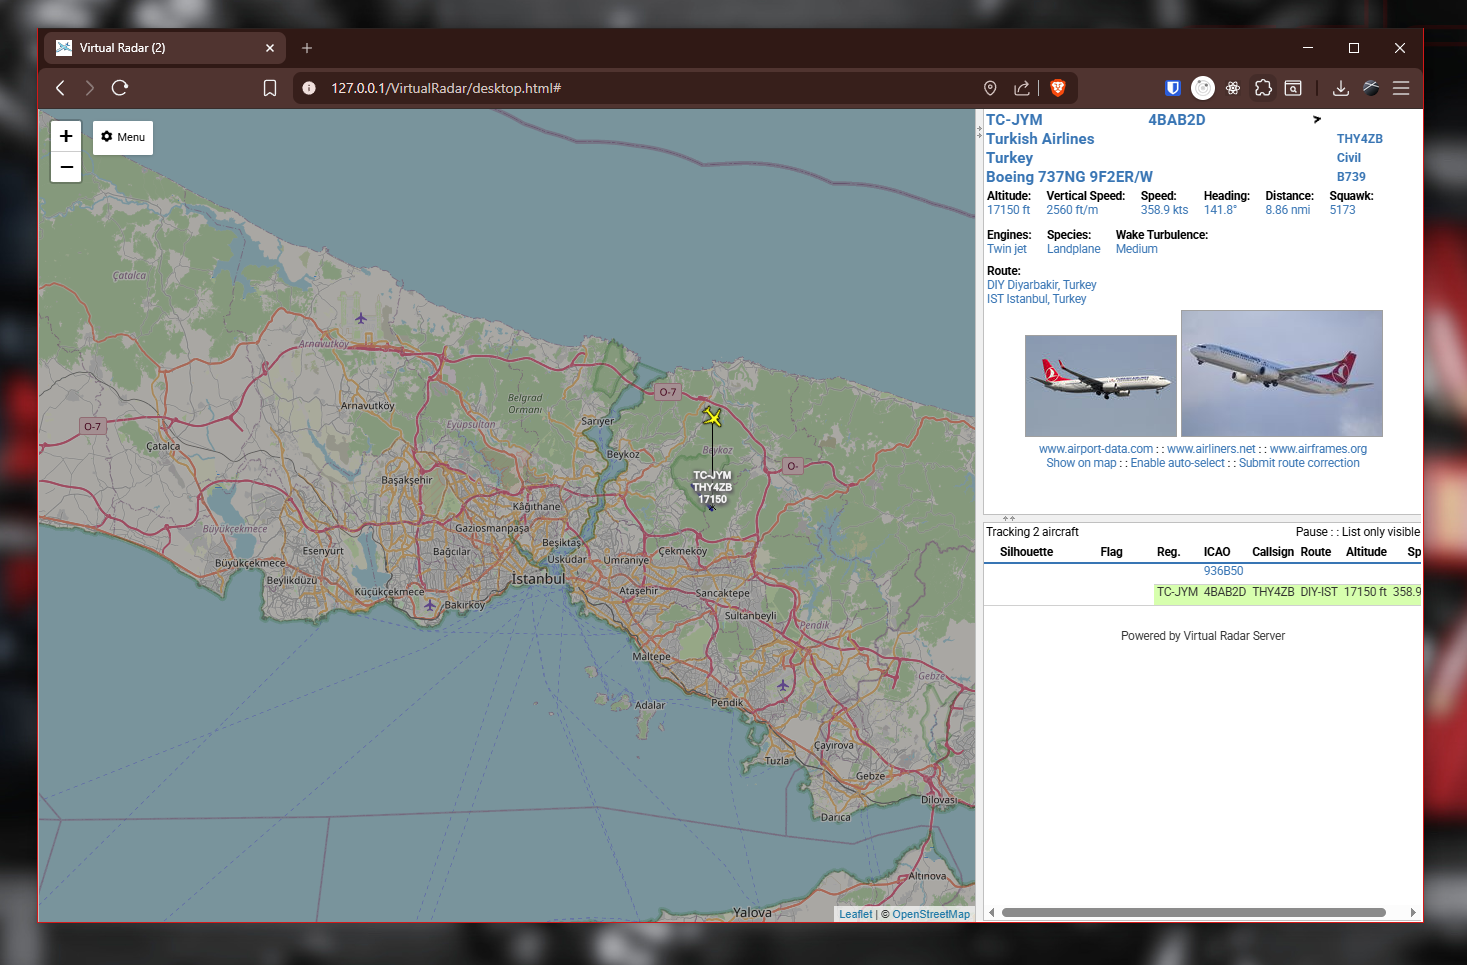
Open the web interface: click on the blue link shown in the middle of the Virtual Radar Server window (for example: http://127.0.0.1/VirtualRadar).
Your browser will open to a map. Within a few seconds, airplane icons should appear if there is air traffic nearby.
macOS Setup
Step 1: Install Homebrew and Dependencies
- Install Homebrew, Open Terminal and run the following command
/bin/bash -c "$(curl -fsSLhttps://raw.githubusercontent.com/Homebrew/install/HEAD/install.sh)" - Install required libraries,
brew install cmake libusb pkg-config
Step 2: Install dump1090
- Install dump1090 using Homebrew
brew install dump1090 - Start dump1090 with this command
dump1090 --interactive --net
You'll see text showing aircraft detections. Each line is a decoded ADS-B message. Leave this window open.
Step 3: Install Max Planes
- Install Max Planes from the Mac App Store:
https://apps.apple.com/tr/app/max-planes/id1450483676?mt=12 - After launching the app, at the top-right corner. Click the dropdown that says
No Connections, then selectLocalhost. - Once connected, the map will start to populate with planes, and you’ll see detailed aircraft information listed on the left side
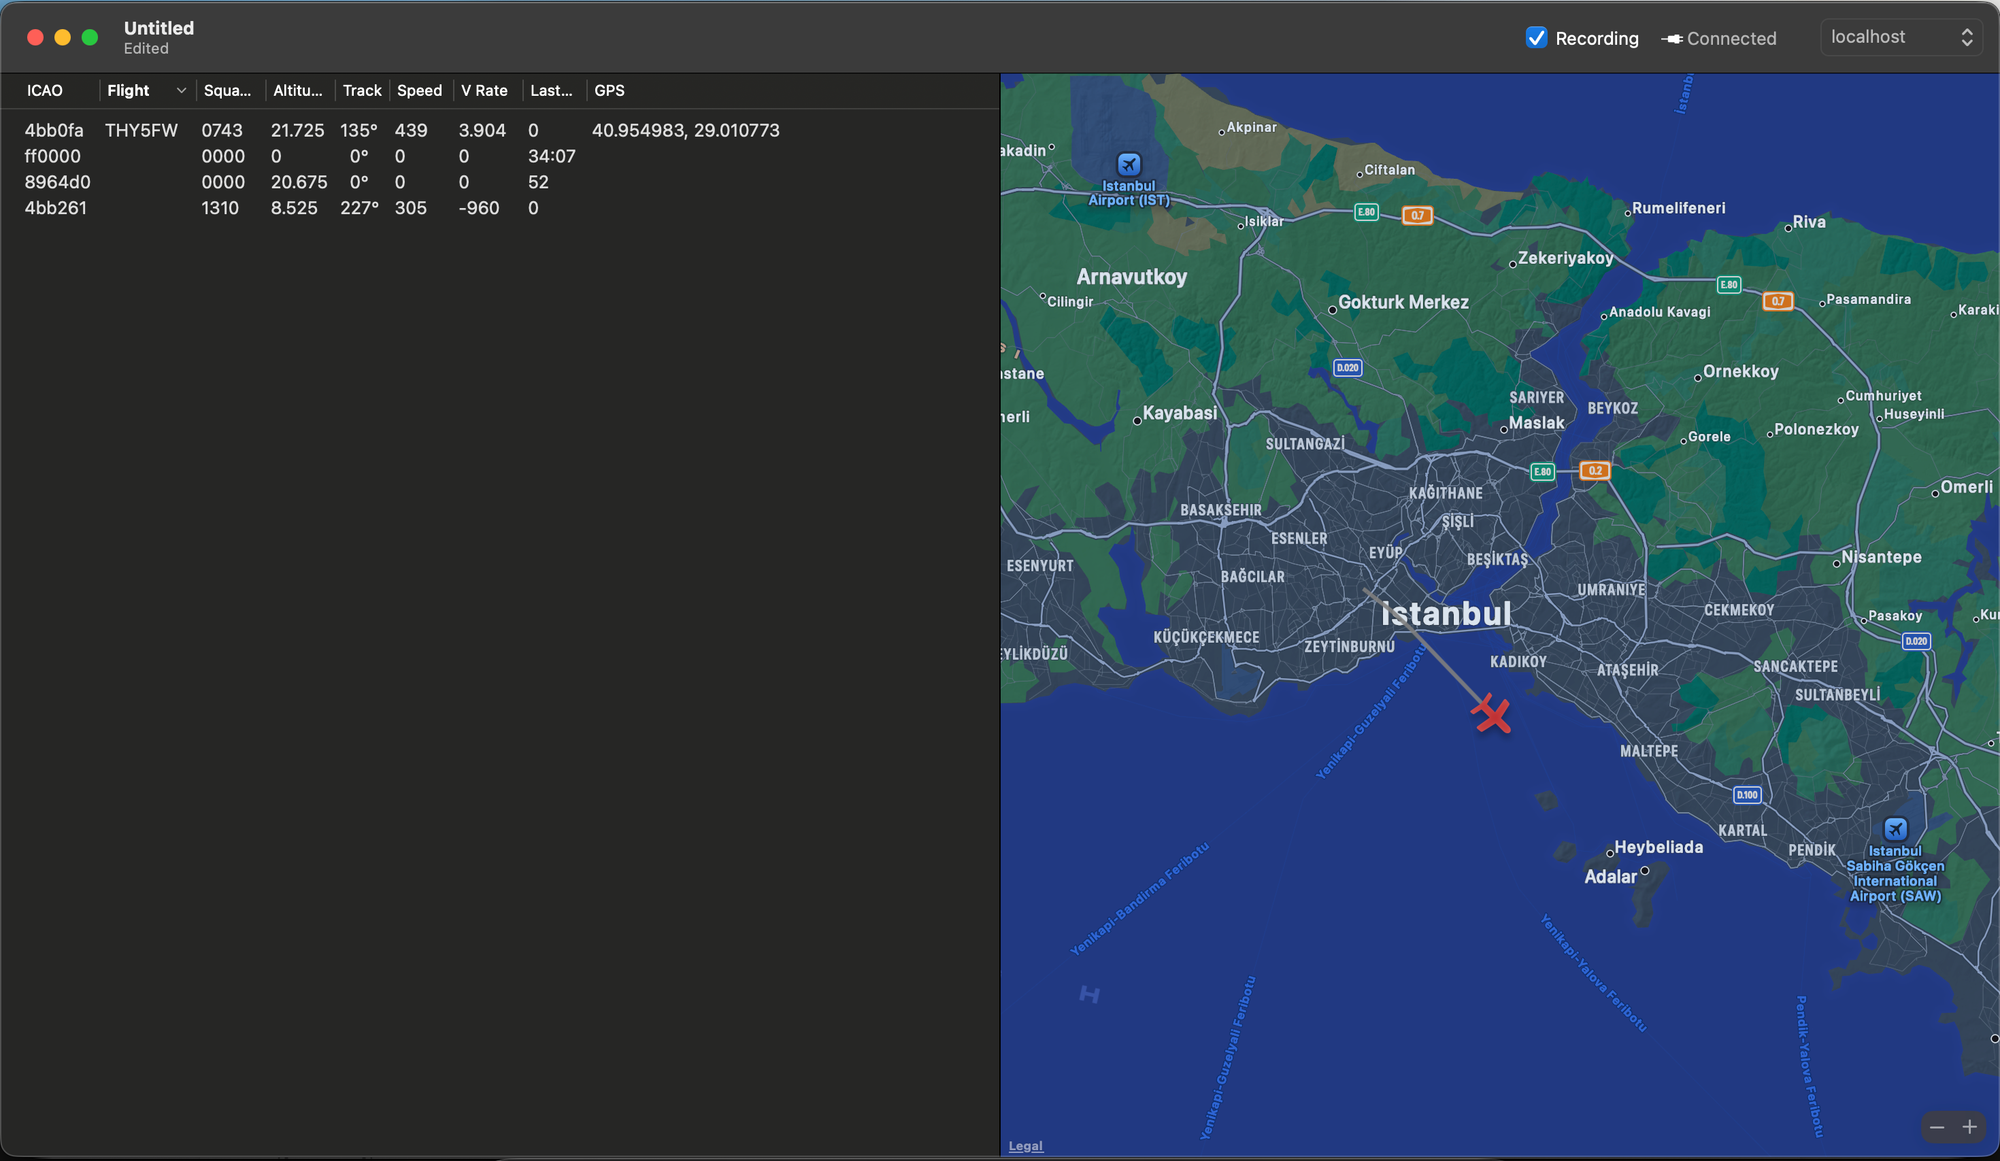
Understanding the Interface
- ICAO code (unique aircraft ID)
- Flight number (airline + flight)
- Aircraft type (Boeing 737, Airbus A320, etc.)
- Altitude in feet
- Speed in knots
- Heading in degrees
- Last seen timestamp
What Else Can This Dongle Do?
Your RTL-SDR receives 24-1700 MHz. Besides planes:
- Weather satellites - Receive NOAA satellite images as they pass overhead
- Marine traffic - Track ships via AIS signals at 162 MHz
- Air traffic control - Listen to tower communications (118-137 MHz AM)
- FM radio - Yes, boring, but it works
- Weather stations - Decode local weather broadcasts
- Pagers - In areas still using POCSAG
But watching planes never gets old. Seeing a 787 at 40,000 feet with its exact destination and speed is consistently fascinating.
Conclusion
RTL-SDR dongles prove that powerful technology doesn't require expensive hardware. A $20 USB stick, free software, and ten minutes of setup give you a nice aircraft tracking capability. The broadcasts are already there, planes transmitting their positions 24/7. Your dongle just listens.
Most people never realize how much data flows through the air around them. ADS-B is one example. Weather satellite transmissions, ship tracking, digital voice communications, all accessible with the same hardware.
Welcome to the hobby. The planes never stop flying.